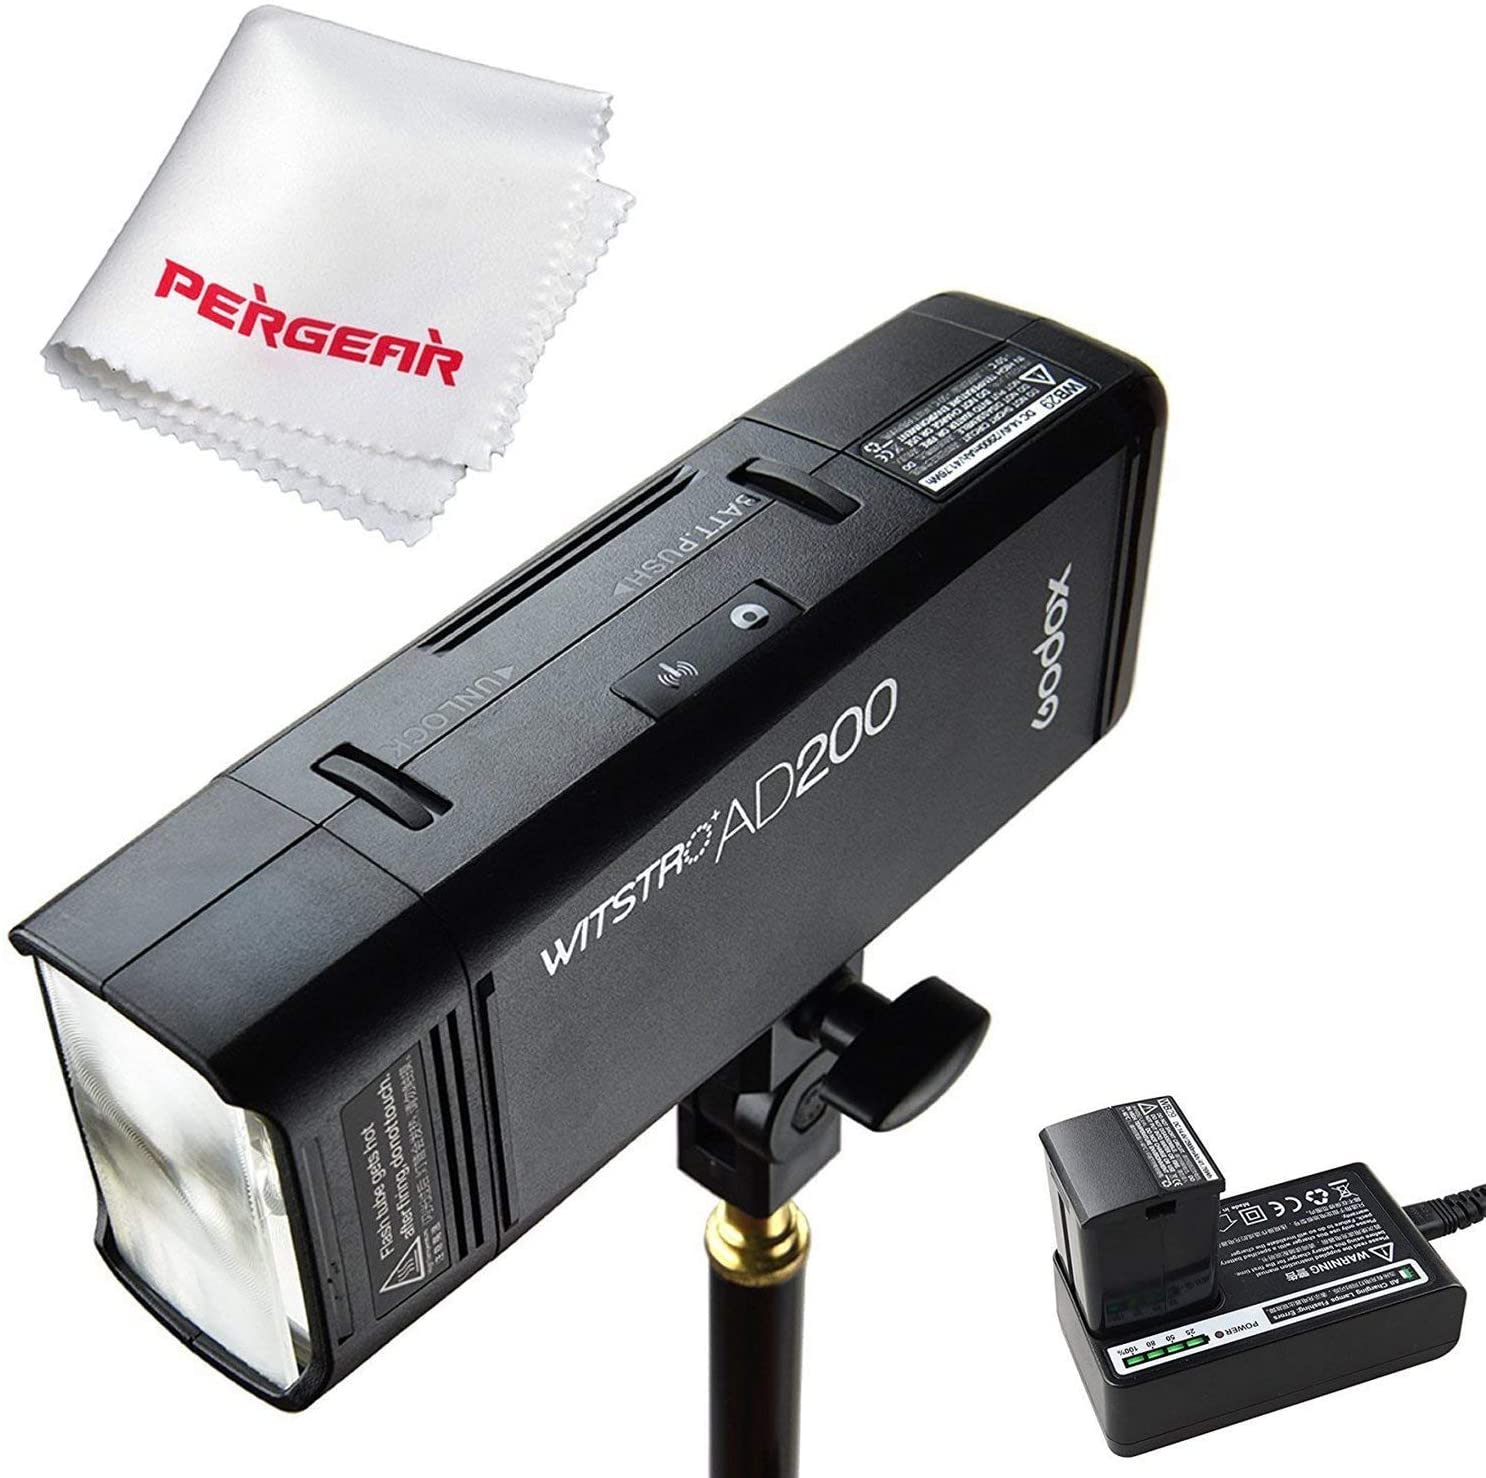
Get yours here: Godox AD200 200ws strobe

Photography gear is so expensive! Nearly every day I read on photo forums where people are looking for budget gear that performs as well as top rated equipment. Let’s put this in terms of cars, if you are looking for a car that drives as well as a Porsche and will retain nearly all its aftermarket value but costs 1/5 of the price, prepare yourself for disappointment. If you are looking for a suitable vehicle that will handle well in the snow and maintain much of its aftermarket price, a Subaru might be the ticket. Sure, it won’t have the power of the Porsche or the people checking you out on the street as you drive by, but it will get you where you need to go and be more than functional. Let’s be honest, who can afford a new Porsche anyway?

When I see people saying they like the way a Profoto strobe looks, but they are on a tight budget I always recommend the Godox AD200 or AD200 PRO line of strobes. There is a ton of information on these strobes, so rather than rehashing the same old material, I will focus (yeah get ready for some photo groaners) on some areas of confusion with these units and tell you about my experience shooting a body of work that has been exhibited many times.

Clearing the confusion

Whenever you do research on the Godox AD200/AD200 PRO line of strobes, you almost always see them mentioned with the Flashpoint eVOLV200, this is because they are the same unit with different branding. The camera store Adorama re-brands the Godox line of strobes to their Flashpoint brand. Same units, same batteries, (in most cases) same packaging and all the accessories work on the Godox or the Flashpoint units interchangeably. Which one is better? They both great, Godox has great customer support and a call will usually yield very fair returns or exchanges, which is also true for anything bought from Adorama under the Flashpoint brand. Since all the accessories fit either unit, I consider them interchangeable. I personally have the Flashpoint units but have friends with he Godox version and they are pretty much the same unit.

My other strobe is a Porsche

Full disclaimer, I usually shoot with Profoto gear, but sometimes it is just too bug and heavy to bring with me if I am doing a location shoot. I shoot for my work all over the United States, and I used to use pelican boxes and bring my big strobes with me everywhere, but eventually I got tired of the hassle and put together a smaller, lightweight location shooting setup which I centered around a couple of AD200s. The AD200 units are just a bit bigger than a standard flash and have four times the power and a lot more versatility.

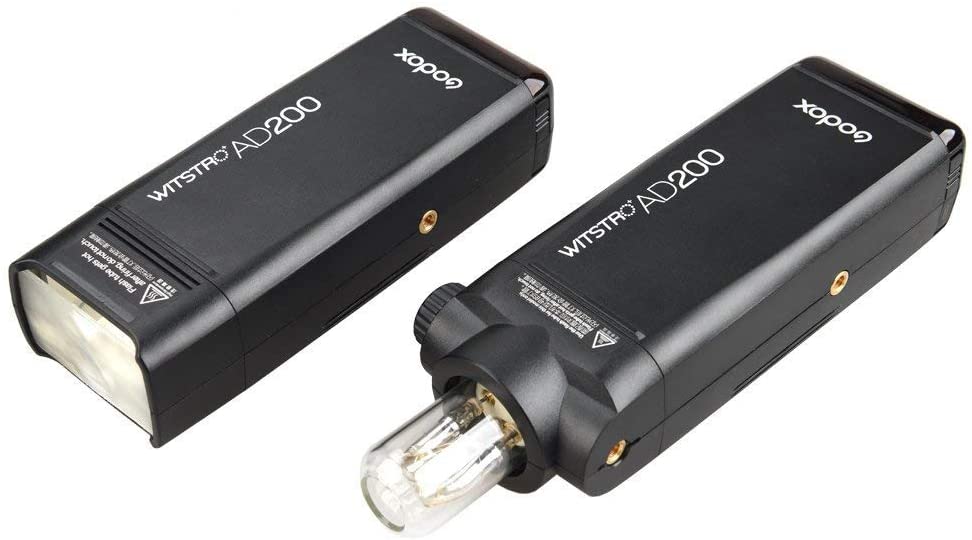
Lighting differently

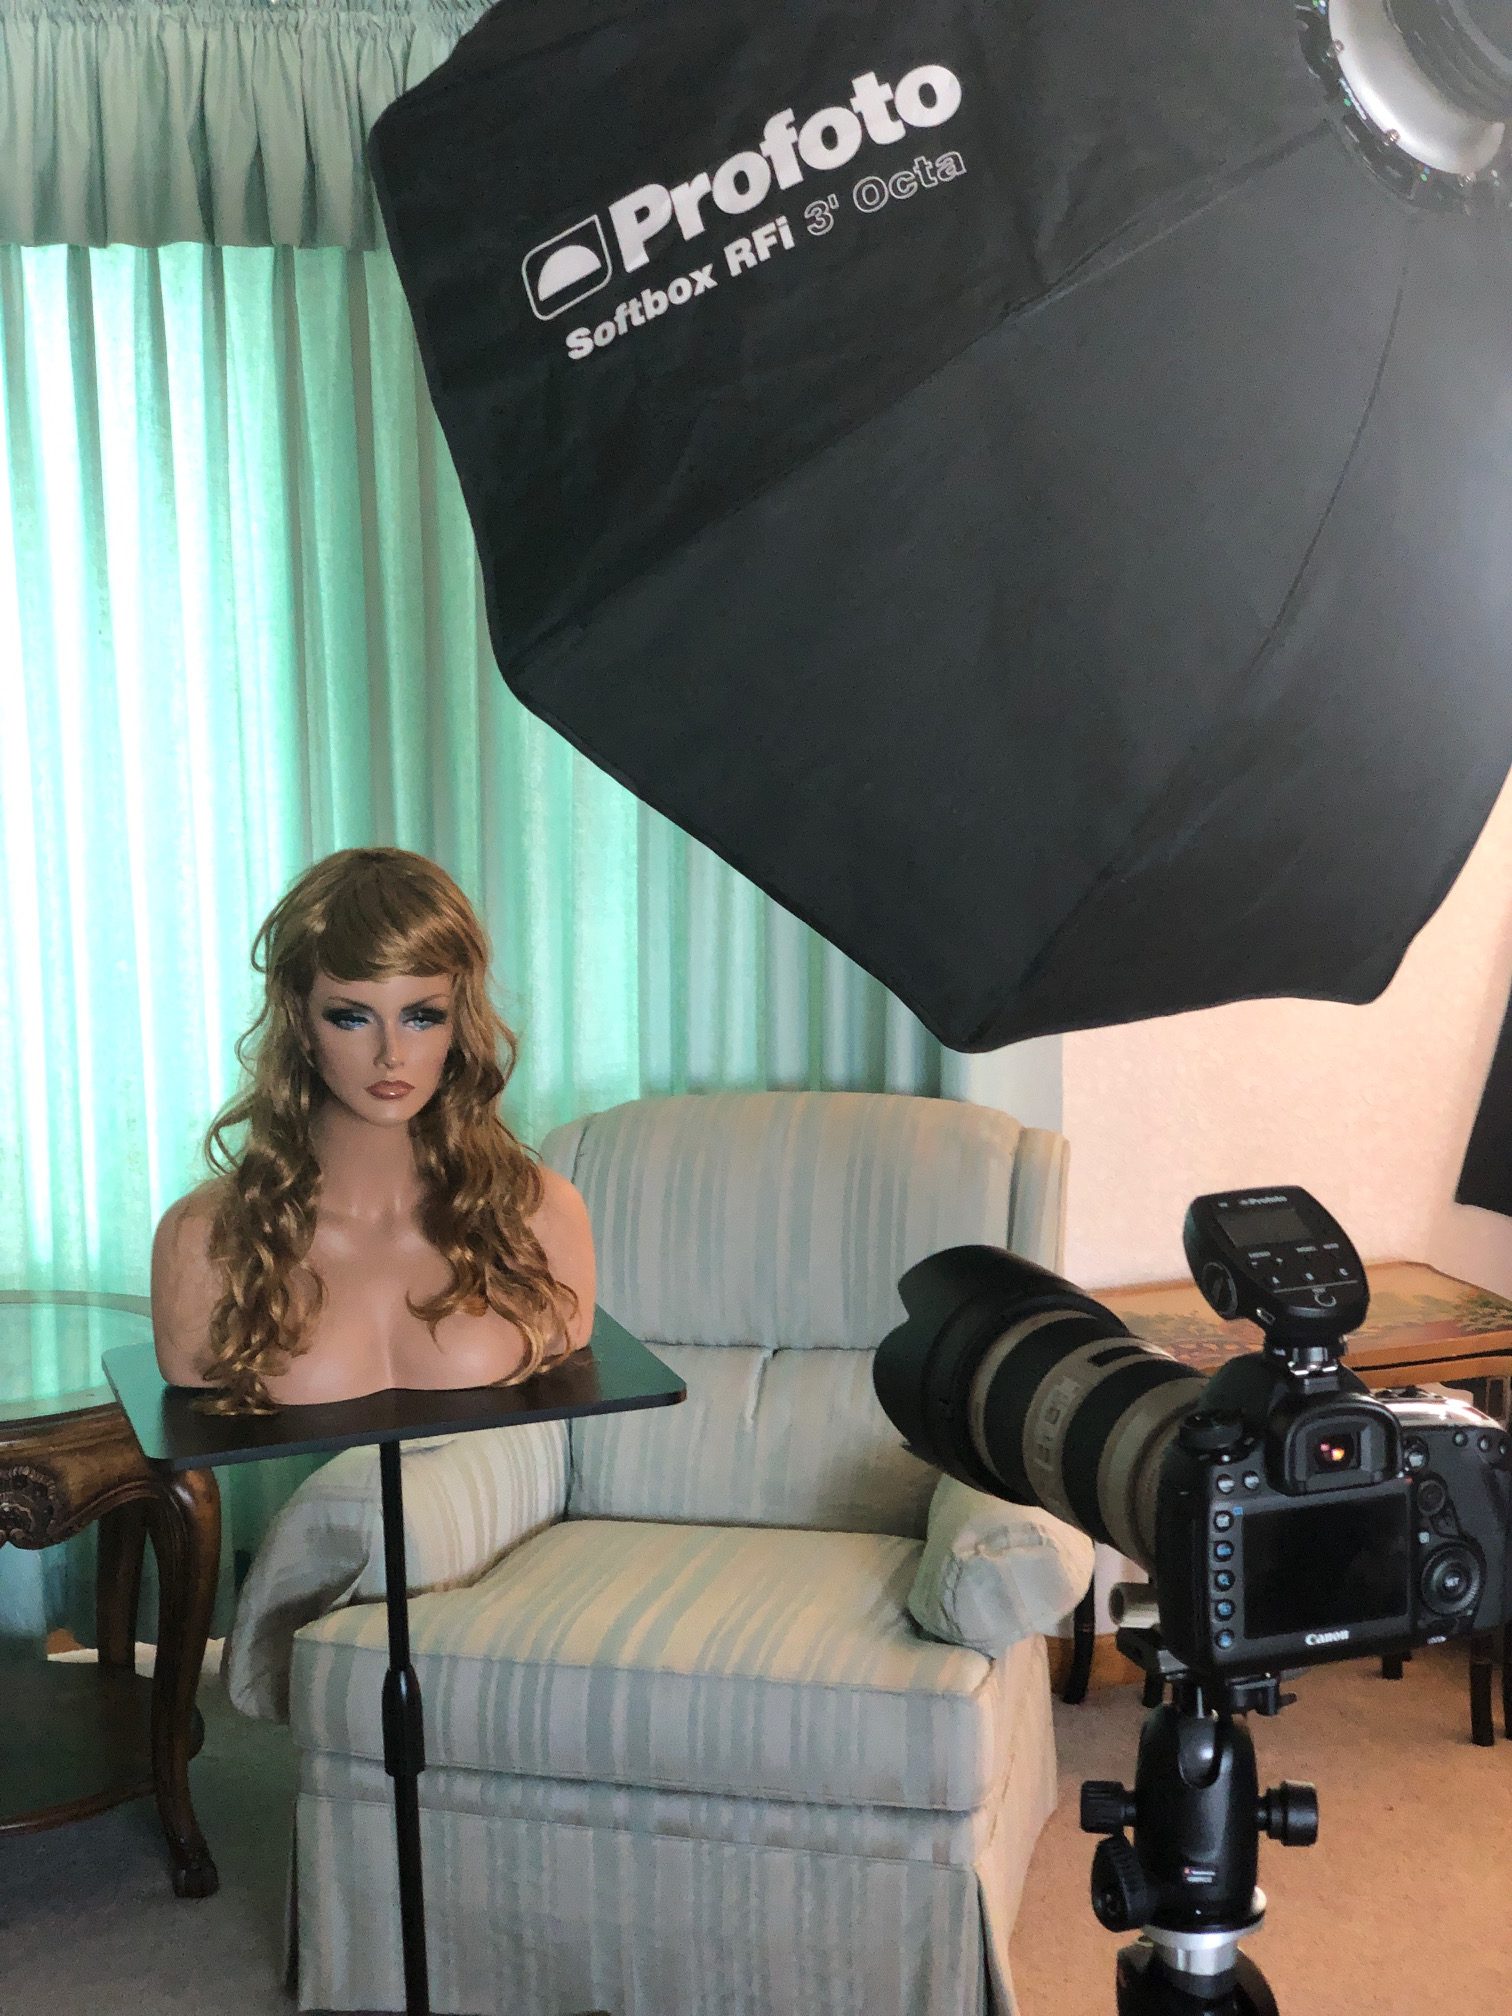
When putting together the components for the best cheap location shooting setup, many might be tempted to run towards a top rated flash like the Canon 600EX II series. I don’t personally like the camera-mounted strobes as much as I used to. I don’t think they have the versatility that a multifunction strobe like the AD200/eVOLVE200 has. The strobe comes with the Fresnel head, (like the head of a speedlight but doesn’t zoom) but for my work, I primarily use the included bare bulb head in a strip softbox or the 32-inch umbrella from Godox. The bare bulb head produces omnidirectional light and I have found it to work exceptionally well in a softbox or umbrella. If I am looking to have precise control over the direction of the light, when shooting product images or low key portraits I will use a strip softbox, otherwise portraits work well with the umbrella, giving a larger spread of light suitable for standard headshot type portraits.

The Fresnel head, in a softbox gives a stronger hotspot (like any standard camera mounted flash would) but is more efficient than the bare bulb head. When shooting on battery powered strobes, every consideration must be made to conserve power and squeak every shot out of a battery when on location. How does the AD200 do in terms of battery life? The documentation boasts 500 plus flashes at full power. Does it live up to the hype?

Battery Life

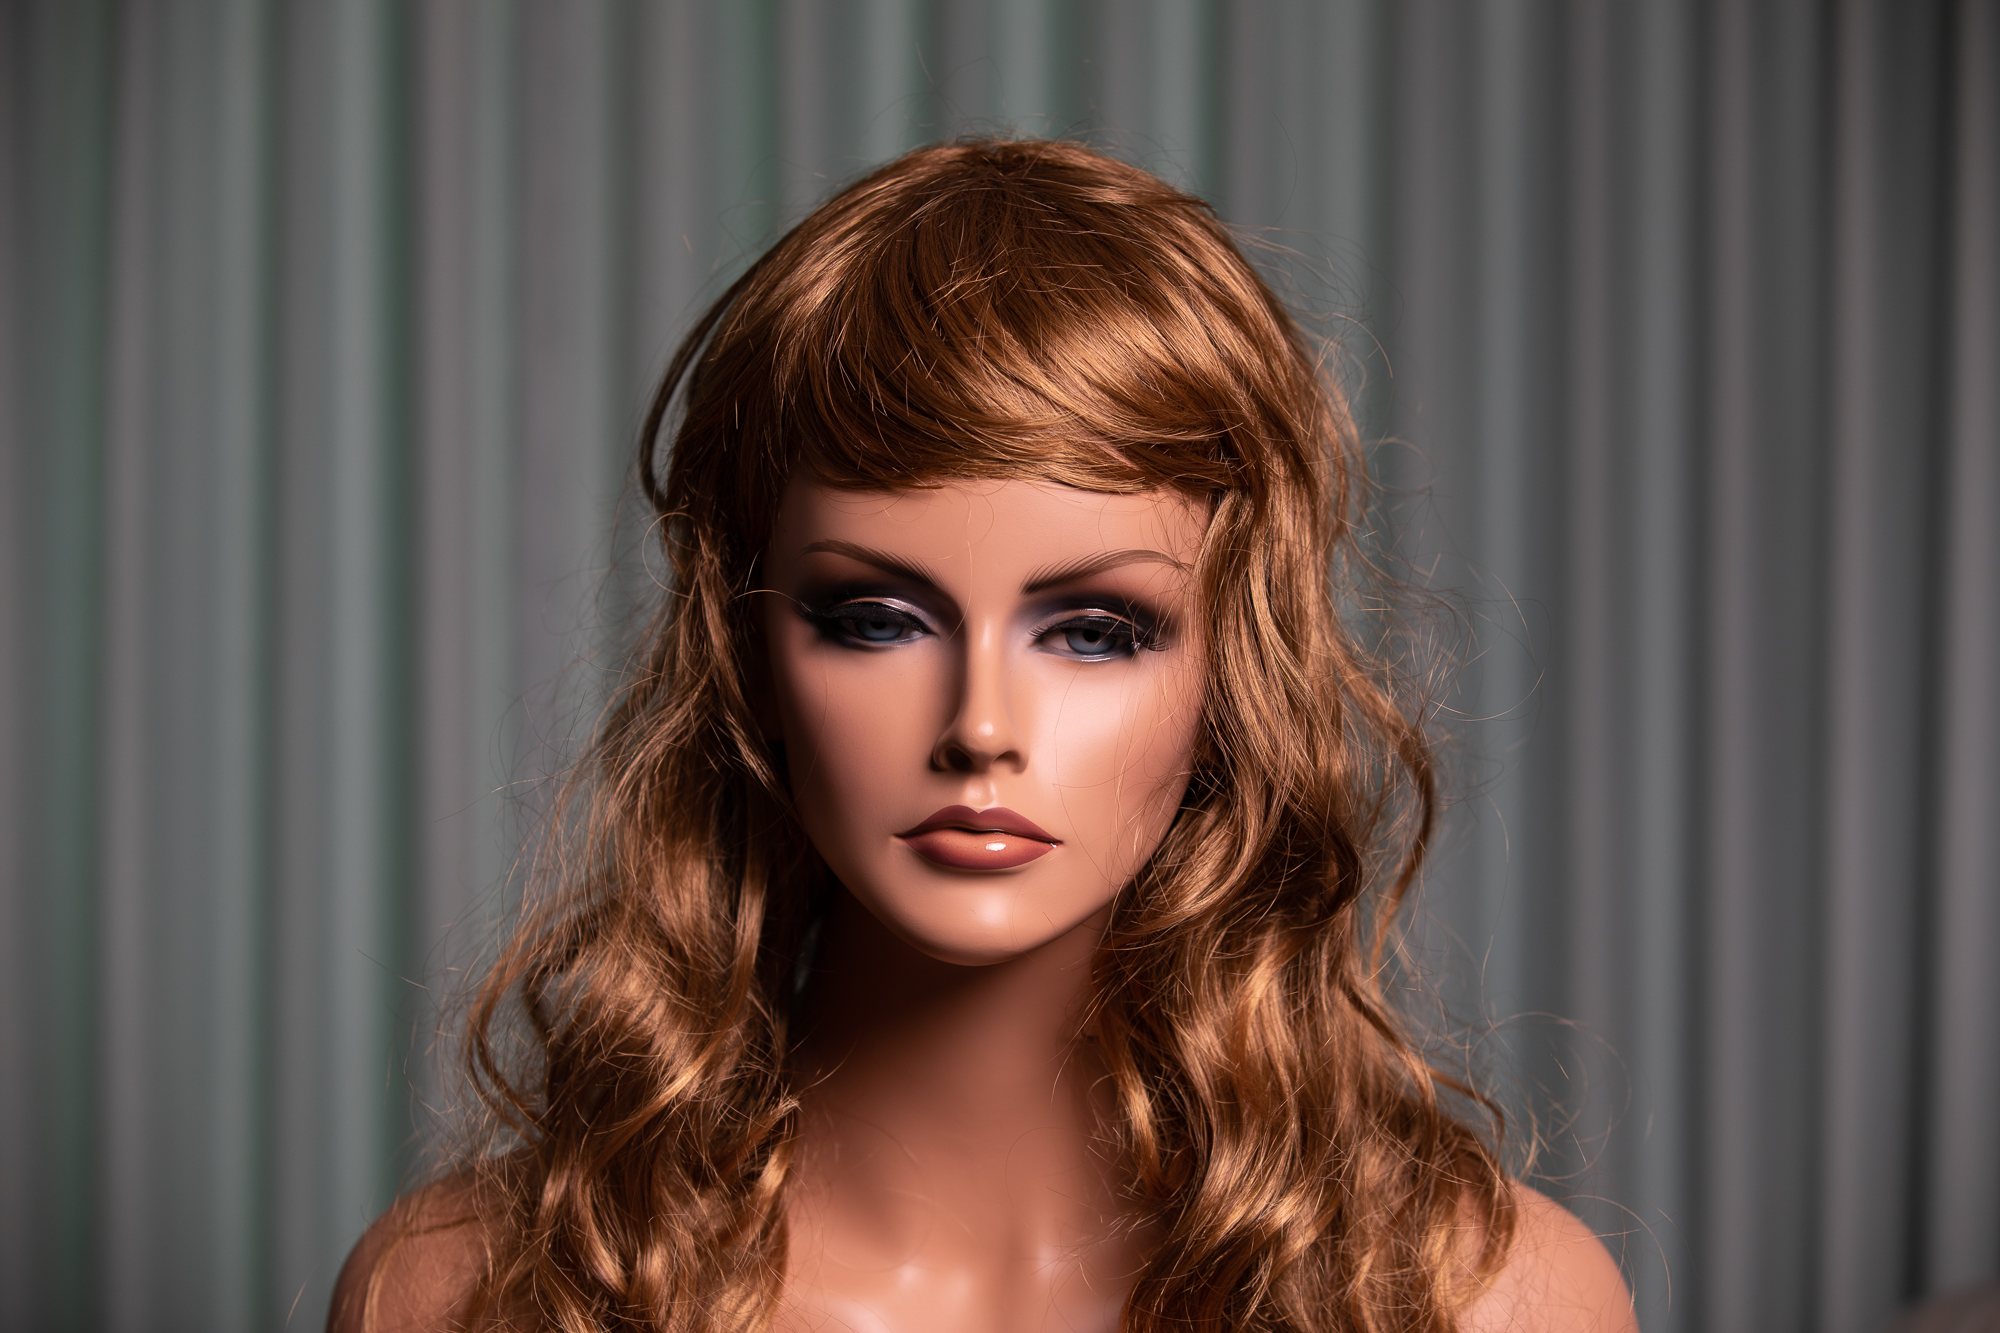
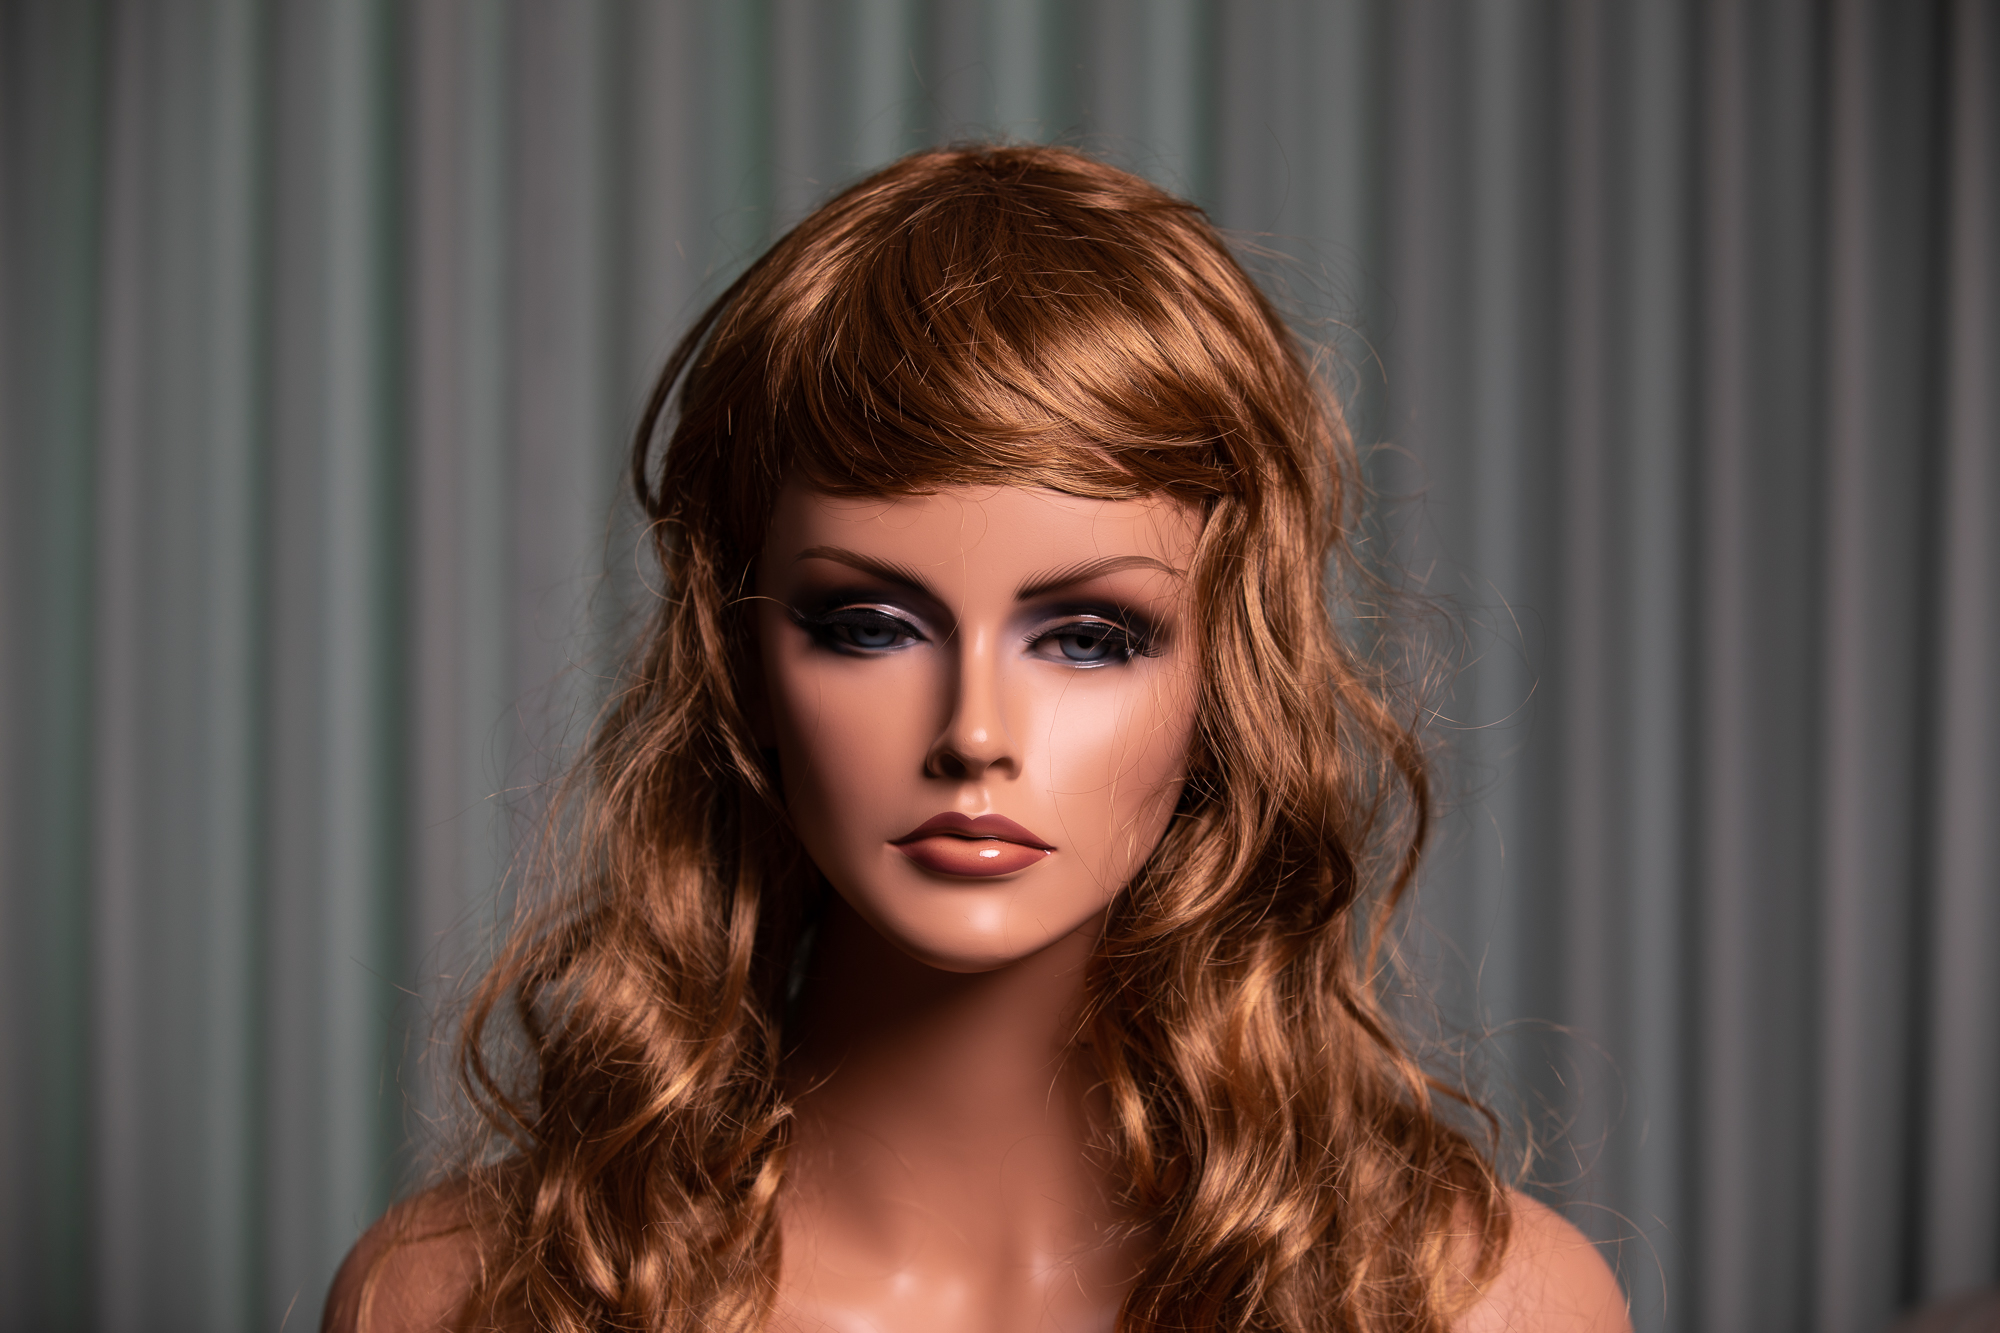
I know what you’re thinking, 500 full power flashes on a single charge with a battery this small seems inconceivable. When I first purchased the AD200 I was terrified the battery would give out the first time I took it as my key (primary) light on a location shoot. The first shoot I did with the AD200 was a low key Bodyscapes style portrait session, so I was not pushing as much power as you would with a standard portrait session. I ended up shooting around 50% power most of the day and after 1000 images I was done with the shoot and still had plenty of power left in the battery to keep going. I set myself up for success shooting lower power for the first shoot purposely and I was very happy with the results. The strobe performed very well, experiencing only one misfire during the shoot.

Feeling quite confident in the AD200 at this point, I scheduled a regular portrait shoot where I would be overpowering bright daytime indoor light. I didn’t buy a second battery for the AD200 as I was determined to run it out of power during a shoot. Would this relatively cheap strobe have enough power to last through a portrait session where I would be pushing the power capabilities of the unit? I setup with AD200 in a Godox S-type bracket which would give me the ability to attach a 32-inch Godox umbrella. Side note: I’m not a Godox fanboy or anything, I just happened to find all this Godox gear on sale at Amazon. Setting the exposure my ambient light, I fired up the AD200 in High Speed Sync (HSS) since at ISO 100 with an aperture of 5.6 (because I wanted the background to be somewhat in focus) I was at 1/800 shutter speed which put the unit in HSS mode. I shot all afternoon and ended up with just over 500 images for the day. With the ambient light, the AD200 spent most of the day in full power and after the shoot I still had enough power to shoot more.

I have shot with the unit many times since that day and I still have never bought a second battery and to this day I have never run out of power on a shoot. It appears Godox underestimates their battery capacity. I have since become very comfortable with the power consumption and have yet to run into a problem.

The only downside to the battery for this unit is that it does take a long time to charge to full. Not a big deal, and I haven’t ever had to wait for it to charge during a shoot. I suppose the first time this becomes a problem for me I will buy a second battery for the unit.  

Triggered

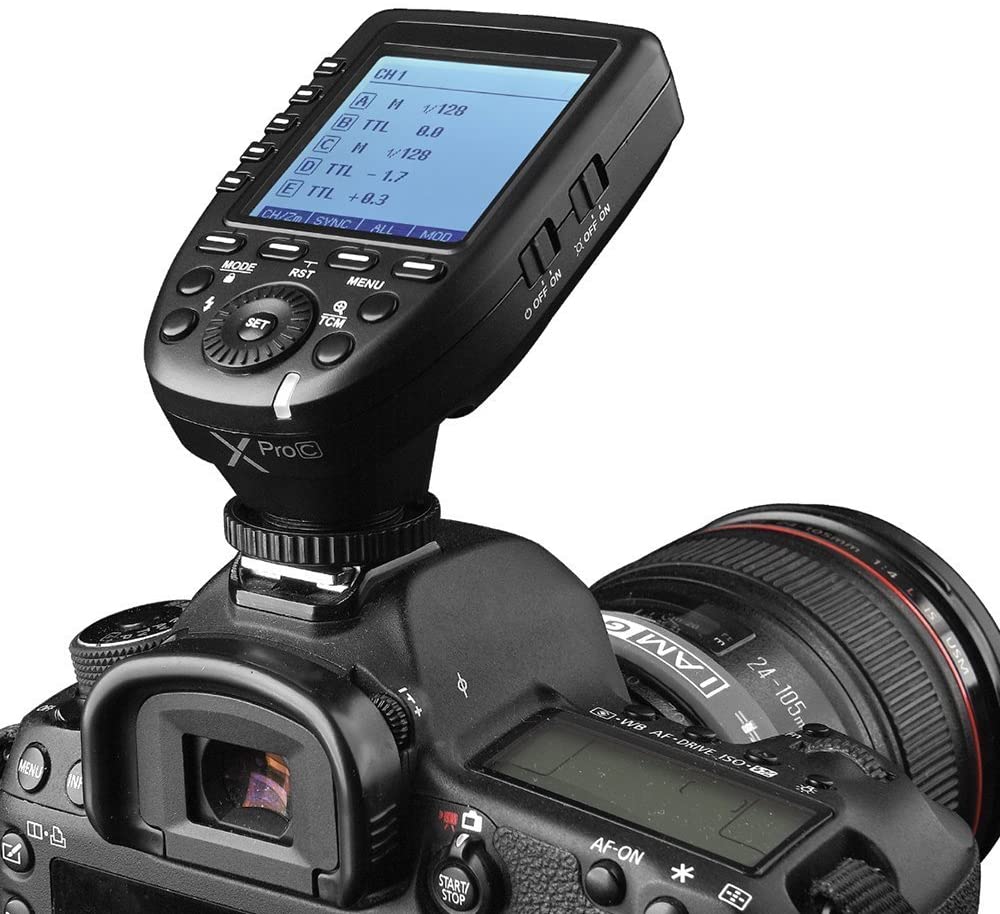
I paired the AD200 with the Godox Xpro-C TTL Wireless Flash Trigger for Canon (They have them for Nikon and Sony etc.). The trigger will shoot up to 1/8000s in HSS. The Godox Xpro-C will easily convert TTL settings to manual with the press of a button and has a large easy to read screen. I really like the slanted design and size of the display. If you shoot with a lot of strobes you will appreciate the 5 dedicated group buttons. The 11 customizable functions also make setting up the trigger just the way you like it a breeze. It works perfectly with all the Godox strobes I have tried it with including the on-camera style units. Since the Flashpoint branded strobes are all made by Godox, the Xpro-C worked perfectly with the other Flashpoint branded strobes I have as well.   

How does it drive?

Is the Godox AD200 and Xpro-C combination like shooting with a Profoto D2 or B10? No of course not. Is this setup perfectly serviceable and reliable? absolutely. I use this setup as my primary location setup and have had very few issues. It has never let me down on a shoot and I have yet to buy more batteries. If you are a machine gun shooter, then your mileage is going to vary. I would say I shoot at a normal pace and the AD200 has little issues recycling in time before the next shoot. My use scenario is low and normal key portraits and product photography. I don’t shoot sports, but I would say that the recycle time (the time the strobe needs to get ready for the next shot) would likely be a bit slow if you were looking to do images of dancers in motion. If you are looking for this type of recycle time the Profoto D2 is probably a better fit.  

I have shot with everything from cheap radio popper triggers cobbled with cord adapters onto 20-year-old speedotron strobes to current generation Profoto and Broncolor gear. The Godox AD200 and Xpro-C trigger setup is perfectly serviceable, and functions well. It isn’t going to recycle as fast as a Profoto B10, but then it doesn’t cost over $2000 either. If you are shooting fast, you might miss a shot here and there, but overall, it is a very nice rig to shoot with. I would recommend this setup to anyone.

Color

Here is another one of those things that other reviewers don’t mention. I am a stickler for color, and one reason to use a manufacturer like Profoto over Godox is consistency of light output. The Godox strobes (just like all other top rated cheap strobes) has a tendency to shift light color or power a bit over the course of your shoot. Some shots won’t be as bright, while others may be a bit off in terms of color (a bit). This effect isn’t a big deal and is something almost every budget strobe does. The effects of this color and brightness shift is easily countered by including a color checker in your first shot and using their software to adjust the color and brightness of all the shots in your session. This is not a bit deal for me. To date, I haven’t lost a single shot due to inconsistent light output. I use the AD200 in my professional work without problem. I only mention this point, because this is an honest review and if I were in your situation I would want to know. As a working professional, I don’t consider it any more a problem than I would using any other budget strobe.

Accessories

The Godox AD200 has been widely adopted in the photography community so there are a ton of options for accessories. Batteries, brackets gels, barn doors and a million other accessories are readily available for this little strobe. If you shoot weddings, this is a perfect strobe, because it is light and put out plenty of power to shoot in most situations. I especially like that there are a few different heads available now, such as the LED head which turns the AD200 into a continuous light for video and a round head making the light output look similar to the Profoto A1. This really is a great little versatile strobe.

Conclusion    

I reviewed the AD200 and Xpro trigger because this is the gear I use in my work. There are a million and one YouTube videos and written reviews for these units, but not all of them are totally honest about real-world experiences. The AD200 is a great alternative whether you are just getting started or if you are a seasoned pro looking for a reliable second or location kit. I love that I can throw this strobe into my camera bag with all my lenses and have a perfectly serviceable location shooting setup that is light and has enough power for portraits and plenty of battery life.

I love to hear from my readers! If you have questions about this or any review on this site, or If you have a product you would like us to review, drop me a message on Twitter or on the contact form here on the website. Have a great day!

Twitter: @EpicShit9

Links:


Get yours here: Flashpoint 10″ C stand

Whether you are just starting out in photography or you have been shooting for ages, a C stand is something every photographer should have in their studio arsenal. The C stand, or century stand has been around since the golden age of filmmaking. The hallmark of the C stand is their sturdy three footed base and their weight. The C stand is considered an industry standard for lighting support and there is no shortage of accessories available for them. This is likely one of the most versatile stands available, but are they worth the weight and trouble?

An Alternative

When you mention a C stand to anyone who is intimately familiar with studio lighting the brand Avenger will undoubtedly come up. The Avenger name is synonymous with C stands and was unchallenged until recently.  Avenger C stands retail for around 200 dollars, but competition has arrived in the form of the Flashpoint 10′ C (Century) Light Stand. Products with the Flashpoint name are made and sold by Adorama, a well-known camera store with a large online presence. Adorama also releases their own version of many Godox studio flashes under the Flashpoint name. You can search here on Epic Shit for reviews we have done featuring Flashpoint strobes and equipment. I consider the Flashpoint 10′ C (Century) Light Stand a good alternative to the higher priced Avenger stands and the Flashpoint version comes in at about half the price, 99 dollars.

Comparison

In my years in the photography industry, I have worked in many studios and came to trust the quality and sturdy nature of the Avenger C stands, so when Adorama introduced the Flashpoint 10′ C (Century) Light Stand I was a bit skeptical that a stand half the price of the beloved Avenger stands could compete. My strobes are not cheap and putting trust into a stand to keep my gear from crashing and burning on the floor is something I don’t take lightly. I ordered a Flashpoint 10′ C (Century) Light Stand and hoped for the best. The stand arrived quickly from Adorama and my first impression upon opening the box was that this stand is as heavy as the Avenger counterpart and seemed like it would support a small child without breaking a sweat. The Flashpoint 10′ C (Century) Light Stand weighs as much as an Avenger stand and came standard with many of the grip pieces that need to be purchased separately when investing in an Avenger stand.  The Flashpoint 10′ C (Century) Light Stand I ordered form Amazon (link above) came with the standard turtle base, and some very useful other goodies. The kit included a 40-inch grip arm, two GOBO heads (the heads that allow you to move the arm around or attach accessories to “go between” your light source and your subject) and even a baby pin. The baby pin is a piece of metal which inserts into the GOBO head and allows you to attach any strobe with a standard base. With this kit, if your strobe will fit on a regular light stand, it will fit on this C stand.

Compatibility

The most common question I get when I tell a fellow photographer about the Flashpoint 10′ C (Century) Light Stand is “will it work with my [insert strobe brand here]”? Part of the accessory kit that comes with the Flashpoint 10′ C (Century) Light Stand includes the Baby pin, which slides into the grip heads and will allow you to attach any standard strobe. I commonly use mine with a Godox S-type bracket and AD200 strobe as well as my Profoto D2, B1 and B10. I know that this stand will work with any standard Elinchrom or Paul C Buff strobe series as well. As long as the strobe will fit on a regular light stand, it will work perfectly well with the Flashpoint 10′ C (Century) Light Stand – except it will be a lot more sturdy.

Using the C Stand

If you have used other straight light stands, you may have noticed that once you get your strobe, and maybe a softbox or octabox on there they can feel a bit “tippy” or unstable. We are all using sandbags on the base of our light stands right? I mean, safety first right? We would not want our lights to fall on our clients. The C stand does not remove the necessity of sandbags for stability, but when you have a whole strobe and modifier rig on one it feels so much more stable than a standard straight light stand. The first thing you will notice about the C stands is that they are HEAVY, especially compared to a regular light stand. If you will use them in your home studio mostly, I recommend investing in the caster set which allows you to easily roll your whole rig all over effortlessly. I use my Flashpoint 10′ C (Century) Light Stand at home in my studio and on the road. Due to the weight, I never bring it with me on planes but if I am shooting local, I always throw it in the back of the car.  You will be surprised how sturdy the C stand is compared to other light supports. Every photographer I recommend them to never looks back and always ends up getting at least two. Even if you are using the Flashpoint 10′ C (Century) Light Stand as a straight light stand and taking off the grip arm, it will still be significantly more stable than a standard light support.

Tight!

The biggest difference between a standard light stand and a C stand is that the C stand likes to be tightened, I mean really tightened. I can’t tell you how many times I have been able to get my strobe in just the right position by just cranking down on the grip handle. If you don’t have a lot of hand strength this might be a tough item for you to operate, just like if you don’t feel comfortable lifting a heavier-than-it-looks stand with a strobe and modifier attached. Therefore, I suggest practicing with the stand before you take it on a shoot or shoot a client in your home studio.

Negatives

We have fully established that C stands in general are heavy, so that isn’t really a negative, it is more of a point that should be reinforced. The only negatives I have for the Flashpoint 10′ C (Century) Light Stand is that it is only available (as of this writing) in chrome. Many like the look of the black versions of C stands and the Flashpoint model is not available in other colors. The newer Avenger stands also come with an updated design for the turtle base, where one or more of the legs can be lifted to set the stand up on an uneven surface. This (for me) would only be a big benefit for shooting outdoors in rocky terrain or on stairs. These issues are certainly not a deal breaker by any means, but hey – I had to find something to ding them on, right? This stand works as well as any Avenger stand I have used so other than color this is as close as you can get to a perfect but cheaper than an Avenger option.

Do you need one?

The short answer is yes. The cost of the Flashpoint 10′ C (Century) Light Stand is very reasonable given how much you will probably use it. I have turned so many photographers on to C stands, and always love to hear from people who have been converted to the way of the C stand, please drop me a message and let me know about your experience! I would love to hear from you.

If you have a product you would like us to review, drop us a message on Twitter or on our contact form here on the website. Have a great day!

Twitter: @EpicShit9


There are more videos and articles comparing battery powered flashes than you can shake a stick at. Anyone researching a portable lighting setup will undoubtably look at the strobe offerings from Profoto (B10, B1X) and Godox (AD200, AD600 etc.) but once you have that shiny new strobe unit, you are going to need to pony up for some light modifiers. The most cost-effective of the light modifiers (not counting DIY alternatives) are going to be umbrellas. How do these simple and easy to carry and setup modifiers stack up against the go-to big boy Profoto 36-inch octabox?

My goal in this comparison was to use a few different modifiers of similar size but vastly different costs to determine if the more expensive modifiers would yield superior results in terms of quality of light. For this (subjective and non-scientific) comparison, I used a Canon 5D MKIV and Profoto B10 in TTL mode, allowing the camera to set the proper exposure for an aperture value of f4, ISO 100 and shutter speed of 1/125. I approached this from a “real world” use scenario.  There were small differences in terms of loss of light between the three modifiers, but this experiment was not focused on efficiency of the modifiers, only the resulting quality of light. I kept the distances to the subject and the angle of the light generally the same. My model for this experiment was our tried and true crash test dummy Meghan the mannequin.

To find the candidates for the comparison, I hit Amazon and researched lower-cost modifiers from Neewer, Cowboy studio and others. I settled on Godox, because they have good customer support and are easy to find in stock. The modifiers I used were:


Godox 32″/ 80cm Umbrella Octagon Softbox Reflector


Godox 47″/120cm Umbrella Octagon Softbox Reflector


Profoto 254711 RFi 36-Inch Octa Softbox (Black)


Concerns when buying budget light modifiers

Build quality in budget light modifiers is nowhere near the more expensive models and will likely have a shorter lifespan than “pro level” gear. I would be worried about relying on a lower-cost modifier for an important shoot. These are umbrellas and we all know how prone those are to bending a rib inside, making them unusable.  The smaller Godox model in this experiment uses a standard umbrella architecture inside, and the larger Godox unit utilizes a combination of metal and plastic ribs. After reading all the reviews, some experienced issues after a few uses, but Godox was good about replacing broken units, this is why I chose them over other budget products from Neewer and Cowboy Studios.

Did I mention these budget modifiers break easily?


Technical concerns


Many low-cost modifiers, both umbrella and softbox come with front diffusion material. Many of the manufacturers use fabric whiteners to get the material ultra-white. This process can cause color shifts especially toward blue in your images. This can be resolved by using a product like the X-rite color checker passport, which is a plastic card combined with software which sets up a profile in your editing software for proper color. You just snap a photo of the passport and run it through the software, which automatically adjusts the colors to the proper hue.


The good stuff


  • Both of the Godox umbrellas were really a decent price. I got them on sale for 22 and 32 dollars.  If you are new to light modifiers and strobe work, these can be a good learning tool even if you end up buying a couple of them due to breakage.
  • The umbrella modifiers are easy to transport, and as long as your strobe has an umbrella hole (which most do), you are all set. Even if you get a Godox S-type bracket to use with a speedlight the weight and portability of your lighting kit will be worth it.
  • The umbrella softboxes are very easy to setup compared to a traditional rod and speedring softbox. They open like a regular umbrella and you put the pole inside into the hole in your flash or flash bracket. I know lots of beginning photographers (and some old grizzled ones too) that hate setting up the rods and speedrings of traditional softboxes so much that they just leave them up once they are assembled.
  • Both Godox units come with Velcro-attached front diffusion material. This is something that typically costs around $100 for higher-end modifiers. On a related note, you can buy the grids for the umbrella modifiers for about $20.


The results

Godox 32-inch umbrella
Godox 47-inch umbrella

Before we talk about how the Godox umbrellas stacked up against the Profoto Octabox, let’s look at how the 32-inch umbrella did when compared to the 47-inch. Was it worth the cost to get the larger unit? In short, no. There simply isn’t enough difference when looking at the images of Meghan from the 32 and the 47-inch units. Look at the shadows on the chin and nose, they are reasonably soft, but I expected more light wrap from the 47-inch unit compared to the 32. Both modifiers soften the light reasonably well, but I would likely use a second layer of diffusion if I were to use these for “real” images. The other aspect that surprised me about these modifiers was that there was little color shift from the front diffusion material. The small shift towards blue was easily rectified by warming the image a bit. I would do this in most cases with a portrait anyway.  Still, overall, I must admit that I was surprised these low-cost modifiers performed as well as they did.


Comparing Godox to Profoto

Profoto 36-inch Octabox

How did the Godox umbrellas compare to the industry standard Profoto 36-inch octabox using the same camera and strobe? Surprisingly, not too bad. Looking at the shadows on Meghan’s chin and nose, they are much softer and smoother than the ones from the Godox umbrellas. Also, look at the way the light is wrapping around her cheek on the left of the frame, much softer and smooth. IS this good enough for many photographers? Probably. For my work, I would still go with the Profoto softbox over the Godox units, but I plan to use the smaller Godox modifier for location shooting when weight is a concern. I have a 5-in-1 reflector that works great as a shoot through second diffuser.

Conclusion

For an entry-level modifier, the Godox umbrellas do surprisingly well. I worry about their build quality and only time will tell how long they will last with daily use. If you are just getting into strobes and looking to experiment with some reasonably priced modifiers that you can hone your skills with, these are great.  I’m not convinced that the 47-inch unit is worth the extra money and larger size (doesn’t fit in a suitcase), but honestly, these modifiers are a good deal.

As you grow as a photographer and the quality of your work evolves, you will likely grow out of these, but they are serviceable units for learning and most applications. These Godox umbrellas yield very reasonable results in terms of quality of light, and you don’t have to fuss with all the rods of setting up a traditional softbox.  


I love to hear from my readers! If you try these modifiers, please drop me a note and let me know what you think of them, I would love to hear your experiences and see some of your images with them. Follow me on Twitter for more reviews and have a great day.

Twitter: @epicshit9


Links to the products in this article:

Godox 32″/ 80cm Umbrella Octagon Softbox Reflector

Godox 47″/120cm Umbrella Octagon Softbox Reflector

Profoto 254711 RFi 36-Inch Octa Softbox (Black)

Godox S-type Bracket


Isolate Earplugs Vs. classic foam earplugs

Recently I have been seeing the Flare audio earplugs on my social media non-stop – so I figured I would pony up the cash and buy a pair to give them a try. I love live music and often attend local concerts. I always wear ear protection and I often photograph concerts.  Good fitting noise reducing earplugs as a necessary accessory for any concert attendee or photographer shooting live music.

I love live music of all genres and I attend concerts in small to large venues as often as I can. My go-to ear protection has always been the classic orange foam earplugs because they reduce the incoming volume by 32 to 35db depending on the manufacturer and they are cheap. With 120db being the average concert level volume, they are a necessity for comfortably listening to live music regardless of where you are in the venue.

Isolate earplugs vs classic orange foams

The downside to the classic orange foam earplugs is that they provide a heavy-handed approach to ear protection, reducing the overall sonic spectrum (sound volume).  When I saw the Flare Audio Isolate earplugs, which promise 25db sound reduction with increased fidelity in the highs I had to try them. For the purposes of this review, I will directly compare the Isolate earplugs to the classic foam earplugs because I think that is a more realistic real-world situation. If you are a musician or work in pro-audio then you most likely have custom molded pro level earplugs, which these earplugs will not replace.

The Isolate earplugs come with three sets of foam tips which allow you to customize the fit for your ear. I tried both the medium and the large size foam tips and found the large size the best fit for my ears. I don’t rush any product reviews, so I wanted to give the Isolate earplugs a thorough trial in live music venues I had been in before, and with varying genres of music.

Testing the Earplugs

For my first test, I saw a rock cover band with a female singer in a local bar, hardly an acoustically tuned environment, but certainly a real-life situation one would find themselves in. I sat in several locations throughout the show and performed an A/B comparison between the Isolate earplugs and the classic foams. The volume level was not as loud as one would encounter at a “real” concert venue, but this was a good first real-world test. I found the claims of the increased high frequency response for the Isolate earplugs to be quite true. The guitars and especially the female vocals came through with clearer crisp highs than the traditional foam earplugs. The Isolate earplugs reduced the incoming lower bass frequencies significantly better than the classic foam earplugs which can be a bit “boomy” in the low frequency reduction. I wore the Isolate earplugs for half of the show and the classic foams for the second half. I found the fit of the Isolate Earplugs as snug as the classic foam earplugs, they did not feel like they were going to fall out.

The foam tips of the Isolate plugs don’t compress and expand to fill the ear canal as much as the classic foam ones do, so I was a bit worried  – but the fit was more than adequate. Sound quality and overall wearing experience for the classic foam was as you would expect, overall sound reduction, muffled and a bit “boomy” regardless of the location in the bar I sat. This is where the Isolate really differed from the classic foams. Sitting in the middle to back of the bar I found the sound quality excellent, just as they claimed the highs were significantly clearer than the classic foams.

The problems occurred when I moved closer to the front. At higher sound volumes the high frequencies of the Isolate earplugs became distorted and crackly. The distortion was distracting and detracted from the enjoyment of the show for me. My final conclusion for a small venue like a bar was that the Isolate shined with medium to low incoming volume levels, but the classic foams worked best for sitting closer to the band.

The next test was a 5000-person capacity venue – a small concert club.  I saw a few different shows at this venue ranging from Rap to Metal. I had similar experiences with the Isolate earplugs here, the back of the venue and near the middle was excellent but moving closer to the band yielded crackly and distorted highs. Even being jostled around near the front of the stage, I was confident in the fit of the Isolate earplugs. 


Next, I attended a hard rock show at a 20,000 seat arena. I consider this a standard test for any noise reduction device. The Isolate earplugs did not handle the volume in this venue as well as the smaller quieter venues. I was on the floor for a while and later sat in the lower bowl seats for this show. The louder volume of this show produced similar results to being closer to the band in previous shows. The highs and vocals were distorted distracting and tough to listen to.

Wanting to give the Isolate earplugs every chance I could, next we went to see Metallica on their most recent stadium tour. The show was in the an outdoor stadium in Denver which has an 80,000 seat capacity. With the large speakers of the festival and higher volume level, the Isolate earplugs really were unusable, and I had to switch back to the classic foams. I was not able to wear the Isolate earplugs for half of the show as I have done in all other tests.

The next test for the Isolates was at the Telluride Bluegrass Festival. This show takes place in a small valley in Telluride, Colorado each year. This is where the Isolate earplugs really outshined any other earplug I have worn. The volume was not as loud as the other rock festival I attended but was too loud to listen to for prolonged periods without protection. I found that the Isolates did a fantastic job of letting through the highs while reducing the lows and mid-range frequencies. I wore them all day long without fatigue, sitting in locations ranging from the back to the middle for most of the day. During the last act of the night I moved right up to the stage area and found that the Isolates handled the increased volume excellently.

For the last test, I saw Jack Johnson at a 17,000-seat outdoor auditorium. My expectation was that like the Bluegrass festival the earplugs would really shine, and they did. The sound level was too loud for me without earplugs and the Isolates brought the volume down to reasonable levels and I ended up wearing them all night long. I found the high frequencies significantly better than the classic orange foams as before.

The Verdict

After all the testing in so many different venues, the Isolate Earplugs did well outperform classic foam earplugs in certain situations. The way the Isolate earplugs let through high frequencies can’t be beat if you are attending a concert or event with medium to low volume amplified music.  Whether these earplugs will work for you really depends on where in the venue you will be sitting and the kind of music you are listening to. They are good to excellent sound quality up to medium loud situations. I didn’t want to go as far as bringing in a sound pressure meter, so the actual levels are a bit objective. One of the biggest advantages to wearing these earplugs is that you can hear people talking to you, this was a bit odd because the people I was with at the shows would talk to me and I could hear them perfectly well which is just not possible with the classic foams. Overall, I liked the Isolate Earplugs, and think they have their uses, I think the quality (if you can use them at the show you are at) is well worth having to bring a second set of earplugs with you.

Optional Accessories


Flare offer a lanyard which attaches to the earplugs, reducing the risk of losing your new earplugs. The Isolate Earplugs are certainly more expensive than the classic orange foam earplugs, but are so worth the expense when you are attending shows which are not Electronic Dance Music or Hard Rock/Heavy Metal. Would I recommend these earplugs, yes, are they Epic? The jury is still out. I tested these earplugs for a year indoor and out and in the situations described above give an incredible listening experience while protecting your hearing.

I love to hear from my readers! Drop me a message on my Twitter below or on the contact form here on Epic Shit if you have a product you would like me to review.   

Twitter: @EpicShit9

Links:


Flare Isolate Earplugs

Flare Isolate Lanyard