The print on demand industry has an incredibly low bar for entry, and if you do it right, it can be a good source of passive income. There are tons of great places to sell your designs online like Redbubble, Teespring, Teepublic and even directly on Amazon using their Merch by Amazon service. Getting started can feel overwhelming because there are so many options, so where do you start? Let’s talk about it.

The basics of design tools

There are two common types of graphic design tools used to create designs for print on demand, raster and vector. Raster or pixel-based tools like Gimp (free) or Photoshop are tailored to work on pixel-based images like photographs. The biggest downside to these programs is that the files you output are limited to the resolution of the source material you start with. As an example, many images found on stock photo sites like pexels or unsplash will be downloaded at around 2000 pixels at 72 to 100 dpi (dots per inch) on the long edge, and most sites like Redbubble want files around 4500 X 5400 pixels at 300 dpi for maximum compatibility with all products. This means that if you download an image of a squirrel depending on how big the squirrel is in the frame, you very well may not be able to use that image for printing purposes. Recent updates to photoshop have included the ability to increase the resolution of an image significantly, and there are dedicated plugins which will also increase the resolution of your image, but these can only go so far before the output begins to look fuzzy and unusable. Generally, if you plan to base your designs on photo type images, you will want to take your own photos so they are in higher resolution.

The second type of tool commonly used for print on demand is vector-based programs like Affinity Designer (Win/Mac $24.99, iPad $9.99) and Adobe’s Illustrator (subscription). The benefit of using vector-based programs is that they are not based on resolution or file size. When you create designs in vector software, you are putting points and curves together to make a shape. These shapes are all mathematically based and can be scaled to any size and resolution needed for your printing needs. The biggest downside to these programs is they take time to learn, and the end result is often cartoon-looking.  Be aware that vector-based programs are CPU and GPU intensive and can really bog down an older computer.

What if I can’t draw?

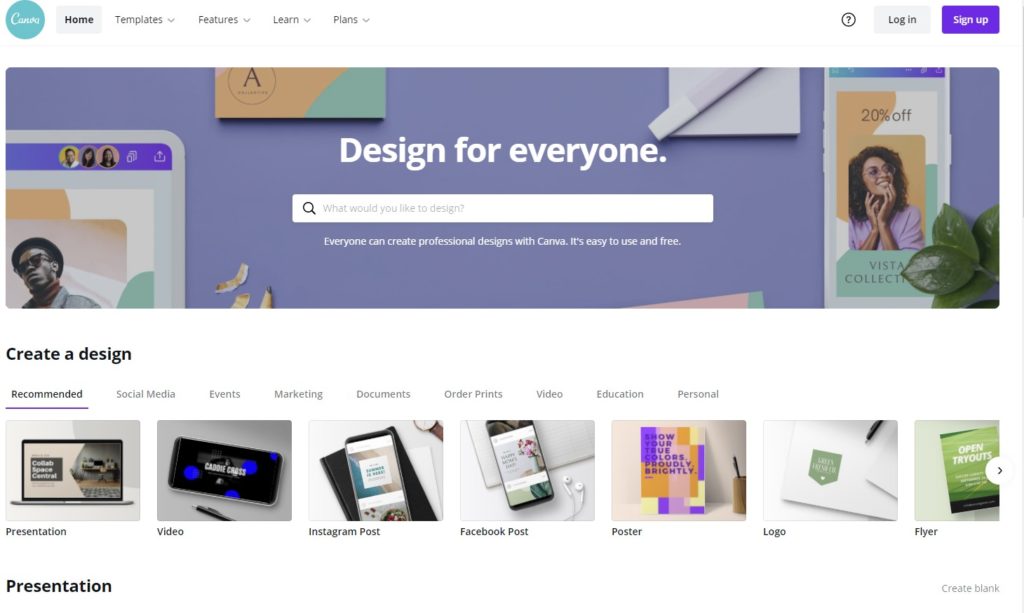
The tool many choose to create designs for print on demand, especially when first starting out is often a template-driven drag and drop site like Canva.com. Canva provides lots of good-looking templates to get you up and designing (and selling) right away. Canva includes commercial usage rights and can keep you virtually buried in designs to choose from if you opt for the premium subscription level of Canva’s service. Canva is a great place to start if you have no graphic design or layout skills and want to quickly get some designs up on your print on demand service. If you have watched any of the YouTube creators, they often tout Canva as the go-to solution for most beginning print on demand workflows.

The biggest downside to using sites and drag and drop solutions like Canva is that everyone with little to no graphic and design layout knowledge is using the same templates. Customers are picky and they tend to glaze over their interest when offered multiple versions of the same shirt with marginally different text treatments. Remember that if your dream shirt says I love Dogs with a picture of a dog, you can execute the design in Canva, but the result you will upload to Redbubble will use text, images and layout that many other designers are also using. Your I love dogs shirt is no longer unique since it uses the same dog picture that is on a hundred or thousand other shirts available on Redbubble. This one reason is why most new designers fail to sell designs on Redbubble and other platforms after watching the YouTuber crowd hype the ease and lucrative nature of print on demand.

Which is best free or paid software?

The best answer to this is: it depends. If you are looking to throw a few text-based designs up on Redbubble and make a few quick sales, then perhaps Canva might be the best option for you. With Canva, you are limited to the look of their designs templates and if you do not plan to do t-shirt design long term this is a good solution.  

The biggest factor to consider in your decision when looking at tools to create your print on demand designs should be longevity and flexibility. What if you start a print on demand business today and spend thousands of hours creating and uploading designs and the free service or software you are using to create your designs is suddenly no longer available? Canva is a big site, but what if the legislation surrounding their content and templates changes? What would you do if the free software you spent hundreds of hours getting used to is no longer being upgraded? Choosing programs like Affinity Designer, Procreate and Illustrator are not only industry standards, but less likely to vanish because their team is not making it on the freeware model. I have gone the free/cheap route with programs before, and the program I spent hundreds of hours learning was suddenly gone because the technology in the free program was purchased by a larger company (Sony) and later phased out.  It is frustrating and can lead to downtime while you learn a new program or suite.

The argument for paid options

What if you want to get serious about making designs and the templates offered at Canva do not fit your needs? If you are looking to make unique designs (that have a better chance of selling), then it is going to cost you two things: money and time. If you subscribe to Illustrator, you will be learning to use an industry-standard design program. There are a million and one free YouTube tutorials available to get you up and running quickly. The point that I like to make is that when you are learning to use an Adobe product, you are learning a lasting skill. It can take time, but there are a lot of sources available for support when you decide to walk down that well-traveled road.  

The time part of the equation is learning the basics of graphic design. YouTube is a good source, but I have found that sites like skillshare and Udemy offer great courses that are produced by knowledgeable instructors. Udemy often has sales offering their master classes for less than 20 dollars. This isn’t an advertisement for Udemy, I just personally use them and have found their content very high quality and I recommend them to anyone looking to learn a skill.

Setting yourself up for success long term

Learning graphic design and a program like Illustrator will net you a set of skills that are not dependent on companies like Canva to produce your product. You are also setting your work apart from the competition. Once you know the rules for text layout and can create assets (like your dog picture for your dream shirt) then your work is elevated above all of the designers who rely on Canva.

One thing those who take this advice learn quickly is that once they have the basics down pat, they have another source of revenue available to them that other designers do not. If you can create the dog picture in illustrator, suddenly you can offer services to other designers who lack the skill to create those assets themselves. Offering to create those awesome dog pictures on sites like fiverr can be a good source of income that you can do while you are creating new designs for your print on demand shops. I have often created assets that never became shirts, and was able to sell them on fiverr, recouping my time spent on those images.

Setting yourself apart

So, learning graphic design and illustrator sets your work apart from the rest of the crowd, and also opens another income venue, why wouldn’t you do it? Remember that a monthly subscription to use illustrator is a business expense, which you will be happy about when tax time comes. The problem with setting your work apart for the competition is that you will get more sales and thus have to pay more taxes. Print on demand is a very low overhead business and a subscription to Adobe’s Creative Cloud can certainly help offset that. Who knew that selling more could cost you so much?

Conclusion

What do you think? Did this article convince you to consider investing in yourself to learn a new skill, or will you stick with the free or drag and drop options? I love to hear from my readers, feel free to drop me a message here with comments about this article or questions about print on demand. Because I use name brand words, I can’t monetize my content so if you like articles like this, please share them with your print on demand community and spread the word.

Now get out there and get designing!

This evening, Design by Humans sent out a notification email informing it’s artist community of a possible data breach. It is time to change your passwords and keep an eye on your accounts attached to DBH. 

The statement reads: 

Dear Valued DBH Community Member,

At DBH, we respect the privacy of your personal information. As a member of the close-knit DBH community, we also value your trust, which is why we are writing to you today.

We recently learned that there may have been unauthorized access to our website and immediately started an investigation to learn more about the incident. Our investigation is ongoing. 

While the investigation is pending, we are advising you to follow responsible security practices and change the password for your Design by Humans account. Please do this as soon as possible. 

We appreciate your patience and understanding. We apologize for the inconvenience this may have caused you.

We will update you once our investigation is complete. Thank you for your continued trust and membership in our DBH community.

Thank you, 

The DBH Team 

No further details have been provided by Design By Humans on the extent of the data breach, this posting will be updated once we receive additional information. We have reached out to Design By Humans for further information but as of this writing have not had our contact request returned. 

Be careful out there. 

Print on demand sites like Redbubble, Teespring, Society6, Zazzle, and Teepublic attract a variety of aspiring artists, and those looking for a good source of internet-based passive income. I spend my days consulting would-be entrepreneurs and help them to improve the sales of their print on demand stores and consult on design quality. One of the most common questions I get is: “how much can I expect to make a month from print on demand?”. To answer this question, one must look at the factors that go into running a successful print on demand business.

The bottom line

I’m not going to waste your time and make you read the whole article if you are just looking for a number, so here is the down and dirty answer: on average, not much. I say on average because there is an 80% failure rate for new shops on sites like Redbubble. New designers see the YouTube channels promoting print on demand as a get rich quick scheme that takes little time and yields awesome passive income. The truth of how much you will make on average per month lies in how much time you are willing to devote to your venture. Print on demand can be a great source of passive income that can grow as you are able to devote more time to it. Will it pay your rent? In most cases, no. Will it pay your electric bill? Once you are established it is very likely to generate on average a few hundred dollars a month. Most of the designers I consult with struggle to make the $20 monthly payout limit on Redbubble for the first six months. After the first few months, and the designer’s work has gotten better and they have a better feel for the audience they are creating for, they will start to see enough sales to get paid at least the minium $20 each month. A good shop with decent evergreen designs can expect to make a couple hundred dollars a month on average.  

It takes time

If you need money to make ends meet this month, then print on demand is not for you. Do not stay at home making designs instead of looking for a new job. Especially at first, the print on demand industry is not going to replace your day job. The YouTube crowd will lead you down the road thinking that you will make thousands a month with little effort. While this is certainly possible it is not the most common experience with this overcrowded finicky industry. They aren’t going to tell you this because they want you to be hyped up and keep coming back to their “how to make your first sale” and “weekly niche review” videos because they make money every time you watch or share one of their videos.  

If you opened your shop today with no designs to upload, expect at least a couple of months before you have enough designs in your shop to make your first sale. If you spend 15 hours a day and put up a thousand “meh” designs, or steal images from the internet to put on your shirts, expect this time to take much longer. The best course is to research your designs, find a good niche to work in, and start making good looking well laid out designs that people want to wear.

Two paths

Designs in print on demand shops fall into two general categories, trends, and evergreen. Trends are the hottest stuff going on in social media and often mirror trends in meme culture. Evergreen designs are ones that are always going to sell like I love my Dog and Teachers are cool etc. Chasing trends can be profitable, depending on how you go about it. If you follow the YouTube creator’s content and make designs based on their trend suggestions you are going to fight for every sale tooth and nail. If you find your own trends by watching the news and social media you can likely identify a trend and jump on it much faster than waiting for someone on YouTube to tell you (and all their viewers) about it. Chasing trends also means you need to spend more time designing for the latest market shift. Depending on who got to the market with the trend before you (and how good your design is) one can do well or very poorly chasing trends. Most of the people I consult with are chasing trends and getting into the market late with a design and not understanding why it is not selling, or making poor quality designs. This can be a frustrating way of doing print on demand and is the most common reason people quit. 

Sales ebb and flow

Another aspect you should be aware of when it comes to print on demand is the way the market tends to rise and fall in terms of sales. As the year progresses, there will always be birthdays and other special occasions for people to shop for, this will be your trickle income, even on slow months. Holidays will be better, like Valentines Day, Cinco De Mayo, St. Patrick’s Day, and the like. Expect to see a jump in revenue around this time if you have good looking designs in your shop. Most shops will see their best results in Q4 around the Halloween, Thanksgiving and Christmas, and New Year’s Holidays. As long as you are not relying on your PoD shop to make rent then as the year goes along it can be a nice surprise when you have a good sale month or hit a trend just right and see some good income.

Designs matter

Your sales are all about the quality of your designs and your ability to promote and advertise your work. Finding a good mix of evergreen and trending designs will help you maintain consistent passive income from print on demand as the year goes along. 

Conclusion

Did this article scare you away? Print on demand can be a great source of passive income, but you need to approach it with realistic expectations. Print on demand isn’t going to pay your rent next month if you just started today, but it can become a nice source of trickle or passive income as the year goes by.

Final thoughts

I have been asked numerous times over the last few months to create a paid guide for my print on demand method. Would you find this interesting? It would include everything from the basic setup and business plan to strategies for file archiving and asset management. Getting your first sales and promoting your work would of course be a significant part of the guide. I’d be interested in hearing your thoughts about this, feel free to drop me a message here on my contact form.

Now, get out there and get designing!

The lure of quick money can be strong when it comes to Print on Demand, this is especially true when you see the myriad of YouTubers who profess to be selling tens of thousands of dollars in merchandise per month on platforms like Redbubble, Spreadshirt, Society6, and Teespring. They promise an alternative to working your 9 to 5 job, and the best part is that you can start with a very small budget! If so, many people are making money hand over fist, why do so many Redbubble and Print on Demand shops fail? Let’s talk about it…

The lure of easy money

 It is easy to fall into the trap of thinking that Print on Demand is a great source of passive income. Those promoting PoD tell you that you can use template sites like Canva and make simple text-based shirts requiring no skill in graphic design. They promise that if you make 100 shirts and then you can sit back and wait for the monthly cash to roll in. This is where many people end up, they make the same shirts that everyone else is making, using the same templates that everyone is using, and upload to the same services that everyone else is using. Are we starting to see the source of the problem yet?

It takes time!

If Print on Demand is your first foray into internet-based business ventures, you will quickly learn that nothing on the internet happens quickly, unless it goes viral of course. It takes time to research new shirt designs, create the design, upload the design, research the keywords for the design, and upload the designs to the print on demand servers. Once the designs are live, it takes time for Google to index them and get them in front of your customer’s eyes. After a while with no sales designers will realize that print on demand takes time – quite a bit of it. It is at this point where many designers turn to upload automation services like Merch Titans which allow you to upload to a few different services at the same time. This does come at a risk however, when you sign up for your accounts, the agreement you digitally sign for most print on demand services state that automated upload services are not allowed. Using these automated services can result in your account being banned. The automation services aren’t free and suddenly, the no startup fee business is costing you ten bucks a month for access to an uploader service.

The market is crowded

The promise of quick cash in print on demand has brought a ton of designers into the industry. Rather quickly, you will realize that a lot of people are making the same design and offering it in their PoD shop. This leads to the desire to make more compelling and interesting designs, so designers who are not skilled in graphic design will turn toward the paid version of the template services like Canva premium. Just like that you are paying 10 dollars for your automated uploader system and 8 dollars for premium access to better templates. When you are starting out in print on demand, many will be struggling to make 18 dollars a month. Suddenly, you are losing money every month creating the same designs as everyone else is making.

My designs aren’t selling!

Here you are, you have created over 100 designs for your print on demand shop, but they aren’t selling. You search the internet and come across articles like this, post on Facebook forums, and even try Reddit but your designs aren’t selling, and you can’t figure out why. The tough truth is that you have fallen for the get rich quick scheme that is so pervasive in the print on demand industry. In an effort to recoup their initial investment designers often turn to copyrighted material and start to make designs featuring Nike, Starbucks, DC comics characters (how many fake batman shirts have you seen?) Using copyrighted material in your designs will often break the dam, and you start seeing some sales. You will quickly recoup your initial investment but as soon as things get going, your account gets banned, you might get a letter from DC Comics or Disney from who you “borrowed” your designs from. You have no leg to stand on, you know when you used the copyrighted material you were doing something you weren’t supposed to. Now your car and home are in danger because they have big lawyers, and you can’t afford to hire one because you aren’t even making enough every month to cover the costs of the automated uploader service and Canva premium. Your “no startup budget” print on demand business venture is now costing you a whole heck of a lot more than you ever anticipated.

Failure is an option

Conservative estimates put the failure rate of print on demand businesses at 80%. Based on the comments and questions I get here on this forum, and all the questions I answer on the Facebook groups I work with, getting started in print on demand is tough unless you have a plan. If you think there are shortcuts and you can use Canva or steal images from google images for your content, you are destined for failure. If you troll design groups and steal ideas or designs, your success will also be short-lived. If you don’t want to take the time to exhaustively research the latest trends, or find good niches for evergreen designs then this isn’t the business for you.  If you fall into these categories I would suggest cutting your losses now and walking away.

Make a plan

Customers are picky, plain, and simple. They want the coolest looking designs with the words they searched for at the best price. If you have a shirt that says I love dogs in boring text and your competition has I love dogs with a cute little dog and the text laid out in a compelling way, and you are both selling them for the same price on Redbubble or Teespring, which one do you think is going to sell first? The cuter design with the better laid out text is going to beat out a “plain jane” design every day of the week. This is one of the many reasons print on demand shops fail, not taking enough time to layout the design. The second reason is that many designers jump into the deep end of a very populated niche like yoga or alcohol. Do your research, find a niche you are passionate about the make some shirts for it, if they sell then expand and refine your work and offer more designs for that niche. Designers often ask me what they can do to compete with those shops with graphic design experience?

Knowledge is key

There are a million places online where you can learn the basics of graphic design and layout. It can be incredibly boring, learning about text and typefaces that work in specific situations and how color harmonies work can make your designs stand head and shoulders above the ones who are struggling to make a sale. Consider taking a class from a reputable source like Udemy, they offer a lot of great classes and they often have great sales. YouTube is hit or miss with the quality of the content and remember that content producers on that platform are interested in time spent viewing. They will make shorter duration videos to engage your more in the hopes that you will stay on their channel and click the next video. Udemy charges a one-time fee and you can watch the course at your leisure. Udemy isn’t a sponsor and I don’t get anything for talking about them, I have used their service many times and overall I have been very happy with the quality of the courses offered there.

Areas to avoid

I cannot tell you the number of times that someone has said to me: just tell me the niche I should be working in to make money. Think about it this way: why would I tell you and everyone else reading these articles the niches I am working in? I am happy to give you help with designs, implementation and steer you toward the light in terms of making more money with your print on demand shop, but I’m not going to tell you which niches to work in. There are a ton of content creators on YouTube that do weekly niche reviews, but you must take this information with a grain of salt. If I tell you today that you need to be making yoga shirt designs, you, and everyone else reading these articles or watching the videos will be racing to put up as many designs in that niche, instantly flooding it and making it way more competitive. The only ones profiting from providing this information is the YouTube creators raking in the views on their videos about new hot niches. Don’t think for one moment that they aren’t going to be making everything they can from the niches they are giving you in the videos before they pass the information along to you. What would you do in that situation?

Don’t bother buying the all in one print on demand courses that are offered all over the internet, they are telling you the same stuff I’m telling you here. Start a shop, you can do it, get a Canva account, Get a Merch Titans account, do research for your designs before you put time into them and of course find the smallest niche you can to work in and expand from there. The most important thing you will learn from a print on demand class is to make great looking designs. Even if you are working in a boring niche or just using a few words, be creative and lay the design out so it looks better than the ones available in other designer’s shops.  See? Now you know everything, and it didn’t cost you a penny.

Lastly, when you are on Facebook or Reddit, don’t beg people to tell you the niches they are working in. When someone is selling well in a niche they aren’t going to tell you about it don’t be silly.

Conclusion

With all the ways to fail in print on demand, why bother to stay in it? Why do I bother to support artists who want to create work and sell it online? Because the first time you are out and about in the store or at the mall and you see someone you don’t know wearing your design, the feeling is unforgettable. The passive income doesn’t hurt either once you get your shop rolling and find out what designs are selling best to your audience. Stick with it, make sure you have a plan, and don’t fall into the get rich quick schemes.  

Because I use copyrighted words and phrases, and often talk about brand names I can’t monetize this content, so please support this page by sharing the content with your print on demand forums and colleagues.

Now get out there and get designing!

Getting those first sales can be difficult. If you frequent Facebook or Reddit forums geared towards sharing your work, you might be saddened by everyone boasting about all the sales they are getting, but you are seeing very few if any. Do visitor numbers matter? Do you get traffic on your Print on Demand shop but no sales? Do you have hundreds upon hundreds of people favoriting your art but no sales? Traffic, visitors, and favorites can be difficult to understand so let’s talk about it…

Traffic

There are three distinct sources for traffic headed to your Print on Demand store. In the case of Redbubble, or Teepublic, they will start promoting your work right away. If you are using Teespring then you have to fulfill the requirement s of their trust score (by getting a few sales via direct promotion or direct marketing) before they will start promoting your work. Traffic types include:

Site traffic

Redbubble, Teepublic, or Teespring market your work more as it sells better. The more you sell the higher your work will rank in the pages when a customer searches the site. Your work can appear in their email advertisements, blog posts, or direct ad sales on sites like Facebook. This one is pretty simple – the more you sell the more they promote you and the more you sell.

Direct customer engagement

This is where you promote your work on Facebook, Twitter, Reddit, Instagram, or direct email. The user clicks the link you provide with your advertising material and is taken to your shop. This is where you are going to get your biggest number of sales right away. The more you promote your work the more you will drive direct customers to your shop. Finding good places, good hashtags and niche forums to advertise your work should be a good portion of your time spent on marketing your products. Do remember that there is a fine line between advertising and spamming. Putting an ad for a cool new design in your favorite yoga forum is good, but flooding the forums with all the products that your cool new yoga design is available on is spammy and will make most people tune you out or worse cause them to complain to the forum admins about your poor advertising practices. Good engagement, and mentioning your wares when you can will go a longer way than carpet bombing the forums with images and links to the same or similar products that you are selling.  

Organic Traffic

When you fill out those description boxes or add tags to your work, the search engines like Google, Yahoo, and Bing crawl it and use that information to generate results that a user can click on when they search for a specific topic. Remember that the bigger the niche you are in, the less likely a user is to see your designs. If a user searches for funny yoga shirts how many results will come up and how likely are you to be in the top few pages? A lot and not likely. This is where specific descriptions are going to pay off. If a user searches for funny yoga shirts with cats meditating, and you have those keywords in your description or tags then you are much more likely to get a successful search result. Just make sure you are using truthful and relevant tags for your work. You can get more traffic to your designs by adding tags that are copyrighted but Redbubble and other sites will quickly delete your design for inaccurate tags or remove the offending tags from your listing. Be responsible with your tags and not spammy. 

Consider the source

Now you know where you are getting your traffic, let’s talk about the kinds of traffic. If you are targeting people interested in yoga and you are a member of a yoga forum, that is a great place to talk about and share your work.  As mentioned earlier, engagement with the community, talking with people and answering questions, etc. can give you opportunities to mention or show your work which feels a lot less spammy than flooding the forum with photos of your cool new design.

If you frequent Facebook and Reddit sharing groups, where artists talk about and share their work, you can get a lot of sharing traffic but not buying traffic. I have talked to so many people struggling with their shops that have hundreds or thousands of likes and followers but only a few sales. This means that that person is doing a good job of marketing, but not a good job of directing that marketing effort. If you are in sharing groups with other artists, I hate to be the one to break the bad news to you, but most of those people are trying to sell their work too, not buy yours. Favorites don’t go a long way to getting sales if they are just from people who are looking to get you to favorite their work too.  You can have a million followers, but if they are all followers that are looking o get sales not people who are interested in your work then you might be starting to realize where your problem lies.

Data Matters

If you are relying on the website (like Redbubble) to give you the data you need to figure out why you aren’t seeing sales, you are missing out on part of the equation. You will see where the traffic came from and how that translated to sales, but what if you could see what the user was searching for when they found your designs? What if you knew how many times the user was shown your content before they clicked on it (impressions versus clicks) This is where Google Analytics comes in. Now, I’m not going to reinvent the wheel here, there are a million and one tutorials to get Google Analytics setup with your Print on Demand shop, so just do a Google or Youtube search. It is very easy, takes only a few minutes, and the data you will get will be much more interesting and informative than the culled data you get from the Print on Demand sites. Most sites like Redbubble just need the tracking ID that Google gives you when you go to www.google.com/analytics (it looks like UA-733458177-1) Once you have your analytics account setup and make a property you just need to paste it into the tracking section of your account on Redbubble. Its super easy.

Losing Traffic

If you had good traffic and sales but have recently noticed a drop off in customers, where you are sharing your work might be the culprit. If you spend a lot of time in the Redbubble and other print on demand sharing sites on Facebook people might be “borrowing” your ideas. Thievery in Print on Demand is rampant and there are no safeguards other than copyrighting all of your work before you post it. Many times that can be expensive ($65.00 per copyright submission of 750 images), and even then most of the stealing happens with sellers that are not in the United States and therefore not applicable to our copyright laws. If you have found your traffic taking a hit, consider doing a reverse google image lookup on some of your more popular designs. Just right-click the image on your proint on demand site and choose look up image on google (in the Chrome browser). Google will find instances of your shirt design and you can see if people have pilfered your work.   

Conclusion

Make sure you are focusing your marketing efforts on the right place online, and make sure you have all the data you can get to make informed decisions about the work you are putting into marketing your work online. At the end of the day, you can have a million followers and likes, but if they all come from people who aren’t going to buy your stuff it is useless. Most customers don’t look at likes and followers before they buy, they see a shirt or product they like with your design and they buy it.

Did you find this information useful? Drop me a message and let me know. Because of the trademarked names in many of my articles, I can’t use ads or monetize it so sharing this content with other print on demand artists help me to keep this site going and provide content like this.

Get out there and get designing!


Get yours here: Travel Duffel Bag Waterproof Canvas Overnight Bag Leather Weekend Oversized Carryon Handbag Brown

Duffel bags are so great for weekend or overnight travel. Here at Epic Shit we get a ton of travel bags to review and almost never post reviews because they tend to be cheap and fall apart easily. With that im mind, enter the Travel Duffel Bag Waterproof Canvas Overnight bag from NEWHEY. I love a duffel bag that is roomy and has enough space for all my stuff for a weekend getaway, but still has pockets I can place harder to find things like my cellphone charger. How does this 46-dollar Duffel stand up to road trips, plane trips and weekend getaways? Read on…

Size matters

The most important features of a Duffel bag are the size and the construction. I have had Duffels bags that were just too big and once they were filled the handles felt like they were going to rip off. I would put this Duffel Bag squarely in the middle size range with dimensions of 22.83(L) by 11.8(W) and 11.8(H),   the included shoulder strap expands from 27.9”–52′.  When I think about Duffle Bag size, I consider smaller than this bag suitable for the gym, and larger than this more for a week-long trip. This bag holds enough clothing and supplies for a 2-3 day weekend trip or business overnighter. I consider this the perfect size for a grab and go over even a weekend roller suitcase. Before we got this, my wife used a weekend size Samsonite roller. Nice she saw the quality of this bag, she bought one for herself. They are great to stuff with clothes and toiletries and throw in the car for a getaway. The interior pockets keep stuff organized so you don’t have to dig around in the bottom looking for loose items like with other bags.

Construction

This is where I was really shocked. I expected a 46-dollar bag to be cheap, but this feels like a much more expensive bag. This Travel Duffel Bag is made of High-density waterproof canvas and has nicely rounded comfortable to hold leather handles. The stitching all around is top notch and it had four metal feet. The zippers are heavy duty and I have yet to have any issues with them even when my bag was stuffed to capacity. I love that the canvas is waterproof, we tested this on our first outing last year. When we arrived at our hotel, it stated pouring and even after sitting in the rain for a few minutes all the clothing inside was still bone dry. I doubt the bag could handle being submerged of course but for the testing and rain exposure I have thrown at this top rated cheap little bag I am very impressed.

The bags come in a few different colors, brown and grey as well as camo patterns.  

User experience

I have been using this bag for nearly a year now. I have stuffed it full and thrown it in the back of the car, stuffed it full and carried it on top of my suitcase on a cross country flight and left it sitting in the rain while I checked into a hotel in the mountains. With all the wear and tear this bag has endured I would expect to see a lot more fraying on the edges or stitching, but I am so far extremely happy with the quality and build of this Travel Duffel Bag.  I have to say I really love this little bag.

Conclusion

I’m shocked at the quality of this bag for the price. I’m happy to recommend this to anyone looking for a nice medium, size Travel Duffle Bag that can easily hold enough clothing and supplies for a weekend getaway or short business trip. The handles are comfortable, and the shoulder strap doesn’t dig into your neck when you are carrying it fully loaded. This bag really feels like a great alternative to a more expensive piece of luggage. I own two of them and am strongly considering these as Christmas presents this year for friends and family. Great bag, great value.

I love to hear from my readers! If you have questions about this or any review on this site, or If you have a product you would like us to review, drop me a message on Twitter or on the contact form here on the website. Have a great day!

Twitter: @EpicShit9

Colors and styles


Get yours here: Canon RC-6 camera remote

If you are a Canon camera user like I am, and you want to take self portraits there are two ways, via your phone and the Canon app or the Canon RC-6 remote. Amazon does sell an alternative remote under their Amazon Basics label, but I have found that to be a bit finicky even though it is half the price. The Amazon Basics remote also does not work with every Canon camera the RC-6 does. So, is the RC-6 worth 20 dollars just to remotely trigger your camera? Short answer – yes!

Compatibility

I hope that with this review I can shed some light on the operation and compatibility of this unit. Many online reviews for this unit do not spend any time on the compatibility of the RC-6 remote, therefore you are left wondering if it will work with your model of camera before you buy. From the Canon official site, these are the camera bodies this unit will work with:

— EOS Rebel T7i Body Refurbished
— EOS 5D Mark IV Body with Canon Log
— EOS Rebel T3i Body Refurbished
— EOS 5DS Body
— EOS 80D EF-S 18-135mm f/3.5-5.6 IS USM Lens Kit
— EOS Rebel T2i EF-S 18-55mm IS II Lens Kit
— EOS 5DS R Body
— EOS Rebel T7i Body
— EOS 6D Body Refurbished
— EOS Rebel T7i EF-S 18-55mm f/4-5.6 IS STM Lens Kit
— EOS M100 EF-M 15-45mm f/3.5-6.3 IS STM Lens Kit Black
— EOS M100 EF-M 15-45mm f/3.5-6.3 IS STM & EF-M 55-200mm f/4.5-6.3 IS STM Bundle Black
— EOS Rebel SL1 with EF-S 18-55mm f/3.5-5.6 IS STM Lens Kit White Refurbished
— EOS 7D Mark II Body Wi-Fi Adapter Kit
— EOS M100 EF-M 15-45mm f/3.5-6.3 IS STM Lens Kit White
— EOS M6 Body Black
— EOS 7D Mark II EF-S 18-135mm f/3.5-5.6 IS USM Wi-Fi Adapter Lens Kit
— EOS 6D Mark II Body Refurbished
— EOS 5D Mark IV Body
— EOS 5D Mark IV EF 24-105mm f/4L IS II USM Lens Kit
— EOS M5 EF-M 18-150mm f/3.5-6.3 IS STM Lens Kit
— EOS 80D Body
— EOS Rebel T5i 18-135mm IS STM Lens Kit Refurbished
— EOS Rebel SL1 EF-S 18-55mm f/3.5-5.6 IS STM Lens Kit White
— EOS Rebel T5i 18-55mm IS STM Lens Kit Refurbished
— EOS Rebel T5i Body Refurbished
— EOS Rebel T7i EF-S 18-135mm f/3.5-5.6 IS STM Lens Kit
— EOS 77D Body
— EOS 77D EF-S 18-55mm f/4-5.6 IS STM Lens Kit
— EOS M6 EF-M 15-45mm f/3.5-6.3 IS STM Lens Kit Black
— EOS Rebel T7i Video Creator Kit
— EOS 77D EF-S 18-135mm f/3.5-5.6 IS USM Lens Kit
— EOS M6 EF-M 18-150mm f/3.5-6.3 IS STM Lens Kit Black
— EOS M6 Video Creator Kit
— EOS M6 EF-M 15-45mm f/3.5-6.3 & EF-M 55-200mm f/4.5-6.3 IS STM Bundle Black
— EOS 60D EF-S 18-135mm f/3.5-5.6 IS Lens Kit
— EOS 60D Body
— EOS M6 Body Silver
— EOS 5D Mark IV EF 24-70mm f/4L IS USM Lens Kit
— EOS 60D EF-S 18-200mm IS Lens Kit
— EOS M6 EF-M 15-45mm f/3.5-6.3 IS STM Lens Kit Silver
— EOS M5 EF-M 15-45mm f/3.5-6.3 IS STM Lens Kit
— EOS Rebel T2i Body Refurbished
— EOS M5 Body
— EOS Rebel T2i EF-S 18-55mm IS Lens Kit Refurbished
— EOS Rebel SL1 Body Refurbished
— EOS Rebel SL1 with EF-S 18-55mm f/3.5-5.6 IS STM Lens Kit Black Refurbished
— EOS 5DS R Body Refurbished
— EOS 5DS Body Refurbished
— Refurbished EOS Rebel T6s Body
— EOS M6 EF-M 18-150mm f/3.5-6.3 IS STM Lens Kit Silver
— EOS Rebel T5i Body
— EOS M6 EF-M 15-45mm f/3.5-6.3 & EF-M 55-200mm f/4.5-6.3 IS STM Bundle Silver
— EOS Rebel SL1 Body
— EOS 60Da Body
— EOS 5D Mark IV Body Refurbished
— EOS 5D Mark III Body
— EOS Rebel T4i 18-135mm IS STM Lens Kit Refurbished
— EOS 60Da Body Refurbished
— EOS Rebel T6s EF-S 18-135mm f/3.5-5.6 IS STM Kit Refurbished
— EOS Rebel T6i Body Refurbished
— EOS 5D Mark III EF 24-70mm f/4L IS USM Lens Kit
— EOS Rebel T6i EF-S 18-55mm f/3.5-5.6 IS STM Kit Refurbished
— EOS Rebel T6i EF-S 18-135mm f/3.5-5.6 IS STM Kit Refurbished
— EOS 6D Mark II Body
— EOS 70D EF-S 18-135mm IS STM Lens Kit Refurbished
— EOS 6D Mark II EF 24-105mm f/4L IS II USM Kit
— EOS 70D EF-S 18-55mm IS STM Lens Kit Refurbished
— EOS Rebel T5i 18-55mm f/3.5-5.6 IS STM Lens Kit
— EOS 6D Mark II EF 24-105mm F3.5-5.6 IS STM
— EOS Rebel T5i EF-S 18-135mm f/3.5-5.6 IS STM Lens Kit
— Refurbished EOS 70D Body
— EOS Rebel SL1 EF-S 18-55mm f/3.5-5.6 IS STM Lens Kit
— EOS 70D EF-S 18-55mm f/3.5-5.6 IS STM Lens Kit
— EOS Rebel T4i Body
— EOS Rebel T4i 18-55mm IS II Lens Kit Refurbished
— EOS 7D Mark II Body Refurbished
— EOS 70D EF-S 18-135mm f/3.5-5.6 IS STM Lens Kit
— EOS Rebel T3i Body
— EOS M3 Body Refurbished
— EOS M3 EF-M 18-55mm IS STM Kit Black Refurbished
— EOS 7D Mark II EF-S 18-135mm IS STM Lens Kit Refurbished
— EOS 6D Body
— EOS 6D EF 24-105mm f/4L IS USM Lens Kit
— EOS 7D EF-S 18-135mm IS Lens Kit
— EOS Rebel T3i EF-S 18-55mm f/3.5-5.6 IS II Lens Kit
— EOS 5D Mark III Body Refurbished
— EOS 5D Mark III EF 24-105mm f/4L IS USM Lens Kit
— EOS M3 EF-M 18-55mm IS STM Kit White Refurbished
— EOS Rebel T4i Body Refurbished
— EOS Rebel T2i EF-S 18-55mm IS II Lens Kit
— EOS 7D EF 28-135mm IS Lens Kit
— EOS Rebel T2i Body
— EOS 7D Body
— EOS M3 EF-M 18-55mm IS STM & EF-M 55-200mm STM Lens Kit Refurbished
— EOS 60D EF-S 18-135mm IS Lens Kit Refurbished
— EOS Rebel T1i Body Refurbished
— EOS 60D Body Refurbished
— EOS Rebel T3i Body
— EOS Rebel T7i EF-S 18-135 IS STM Kit Refurbished
— EOS Rebel T3i EF-S 18-55mm IS II Lens Kit Refurbished
— EOS Rebel T7i EF-S 18-55 IS STM Kit Refurbished

It is a huge list, and hopefully should clear up any compatibility concerns you might have. If your camera is on the list, you are good to go.

Operation

In your camera settings (not on the remote), for most models you have a timer option which can be set between 2 and ten seconds depending on the model of your camera body. I have the 7D mark II and the 5D Mark III and IV and they all have two and ten second timer settings. Set up your camera on a tripod pointing toward you and point the remote at the camera, press the button and the camera will focus and trigger the shutter. This is more for photographers wanting to be in the frame, or for photographers of kids who will be near their subject to coax a smile then press the shutter.  I personally like the single button operation.

Is the RC-6 better than the Canon app? The app gives you access to more of your camera’s operation, but sometimes all you need to do is trigger the shutter. With the app you have to connect to the camera via wi-fi or bluetooth (if your camera has wi-fi connectivity) and often you will lose connection. The RC-6 is simple one button operation. 

Bulb Mode

If you are into long exposure photography or light painting this is perfect, it works with the bulb mode. Set your camera on bulb mode then click once to open the shutter and a second time to close it – no need to touch your camera.

Conclusion

The top rated Canon RC-6 is a great little cheap and simple remote, which allows you to be in the frame of your shot or to trigger your camera for long exposures without jostling the camera around causing blur. I always have this remote in my bag since it is so small. I would order a second battery once your unit arrives so that you have one in your bag. I find that if I don’t use my remote for long periods of time the battery will die as you would expect. Happy Shooting!

 I love to hear from my readers! If you have questions about this or any review on this site, or If you have a product you would like us to review, drop me a message on Twitter or on the contact form here on the website. Have a great day!

Twitter: @EpicShit9


 Get yours here: Altura Photo Professional Rain Cover for Canon Nikon Sony DSLR Mirrorless Cameras

I ordered my Altura Photo Professional Rain Cover Protector for DSLR Cameras about a year ago and wanted to try it in several different conditions before writing this review. So far, I have used the cover in rain, snow, and blowing sand and it performed flawlessly keeping my camera dry and free of debris through the toughest downpour.  When I bought this camera cover, Amazon had it top rated and I can see why, it works very well.

A raincoat for your camera

I shoot with a Canon 5D mark IV, and often use the 70-200 f2,8 IS II with this rain cover. It is difficult to get too excited about a rain cover because it either does the job and keeps your camera dry or it does not. My camera(s) is/are weather sealed, but I use this rain cover out of an abundance of caution. My backup cameras are Canon 5d mark III and Canon 7D mark II, all my cameras fit perfectly (though snugly) in the Altura Photo Professional Rain Cover. I like the drawstrings for extra security over some of the cheaper alternative brands. When you are out in the elements, especially the wind you will appreciate the extra coverage the drawstrings provide. The armholes work well and are long enough to keep the camera from getting wet even in blowing rain. The clear back panel offers viewing of the camera screen and settings. I have read some other reviews that say this screen can discolor with age, but so far, I have not had any issues and I have shot in the elements a lot.   

The rain

I used the Altura Photo Professional Rain Cover on the deck of the cruise ship during our trip to Alaska. Between the salt spray and rain, I was certainly concerned about the camera staying dry (and especially free of salt) while I was up on deck. I shot for over an hour at a time and the camera made it through dry and working perfectly. The Altura Photo Professional Rain Cover is designed to protect and shield a small or professional DSLR camera and it certainly did the job well. I even had several people borrow it and use it on other smaller cameras when I was not using it. This little rain cover has had Sony, Nikon Fuji and everything else in it with no problems.

The snow

I was invited to shoot the winter games for the Special Olympics in Colorado, and the day of the event was not nice at all. With blowing snow, and an average temperature of 10 degrees, I decided to use the Altura Photo Professional Rain Cover to keep with camera free of melting snow. I think the cover helped to keep my hands a bit warmer than other times I have shot without a cover in blowing snow. The cover is made from high quality waterproof nylon, so it wasn’t insulating by any means, but the cover did seem to help maintain a bit of heat from my hands and make the long day shooting a bit more comfortable.

The sand dunes

The last harsh environment type I tried with the Altura Photo Professional Rain Cover was in the Great Sand Dunes in Colorado. I shot most of the afternoon and into the evening with blowing sand. There is nothing worse than getting sand in your lens or camera housing (well other than salt water of course). Maybe this cover was not intended for blowing sand as much as it was for rain, it did a great job. After the sunset, I walked back to the car and took the camera out of the cover and was pleasingly surprised that it was very free of sand and grit. I appreciated the cover protecting the top of my tripod as well. Now, if they only made one for the tripod legs so they didn’t get sand in them!

Conclusion

After a year with the Altura Photo Professional Rain Cover I can say I would happily recommend this to another photographer. The dual adjustable sleeves are great and have worked well with everyone who has used this cover. I also really like the protection from the full-length double zipper. The cover works well and provides access to camera controls whether hand holding or using a tripod. It is tough to get excited about a rain cover for your camera, but if I was going to, this would be the one to get excited about.

I love to hear from my readers! If you have questions about this or any review on this site, or If you have a product you would like us to review, drop me a message on Twitter or on the contact form here on the website. Have a great day!

Twitter: @EpicShit9


Get yours here: Godox AD200 200ws strobe

Photography gear is so expensive! Nearly every day I read on photo forums where people are looking for budget gear that performs as well as top rated equipment. Let’s put this in terms of cars, if you are looking for a car that drives as well as a Porsche and will retain nearly all its aftermarket value but costs 1/5 of the price, prepare yourself for disappointment. If you are looking for a suitable vehicle that will handle well in the snow and maintain much of its aftermarket price, a Subaru might be the ticket. Sure, it won’t have the power of the Porsche or the people checking you out on the street as you drive by, but it will get you where you need to go and be more than functional. Let’s be honest, who can afford a new Porsche anyway?

When I see people saying they like the way a Profoto strobe looks, but they are on a tight budget I always recommend the Godox AD200 or AD200 PRO line of strobes. There is a ton of information on these strobes, so rather than rehashing the same old material, I will focus (yeah get ready for some photo groaners) on some areas of confusion with these units and tell you about my experience shooting a body of work that has been exhibited many times.

Clearing the confusion

Whenever you do research on the Godox AD200/AD200 PRO line of strobes, you almost always see them mentioned with the Flashpoint eVOLV200, this is because they are the same unit with different branding. The camera store Adorama re-brands the Godox line of strobes to their Flashpoint brand. Same units, same batteries, (in most cases) same packaging and all the accessories work on the Godox or the Flashpoint units interchangeably. Which one is better? They both great, Godox has great customer support and a call will usually yield very fair returns or exchanges, which is also true for anything bought from Adorama under the Flashpoint brand. Since all the accessories fit either unit, I consider them interchangeable. I personally have the Flashpoint units but have friends with he Godox version and they are pretty much the same unit.

My other strobe is a Porsche

Full disclaimer, I usually shoot with Profoto gear, but sometimes it is just too bug and heavy to bring with me if I am doing a location shoot. I shoot for my work all over the United States, and I used to use pelican boxes and bring my big strobes with me everywhere, but eventually I got tired of the hassle and put together a smaller, lightweight location shooting setup which I centered around a couple of AD200s. The AD200 units are just a bit bigger than a standard flash and have four times the power and a lot more versatility.

Lighting differently

When putting together the components for the best cheap location shooting setup, many might be tempted to run towards a top rated flash like the Canon 600EX II series. I don’t personally like the camera-mounted strobes as much as I used to. I don’t think they have the versatility that a multifunction strobe like the AD200/eVOLVE200 has. The strobe comes with the Fresnel head, (like the head of a speedlight but doesn’t zoom) but for my work, I primarily use the included bare bulb head in a strip softbox or the 32-inch umbrella from Godox. The bare bulb head produces omnidirectional light and I have found it to work exceptionally well in a softbox or umbrella. If I am looking to have precise control over the direction of the light, when shooting product images or low key portraits I will use a strip softbox, otherwise portraits work well with the umbrella, giving a larger spread of light suitable for standard headshot type portraits.

The Fresnel head, in a softbox gives a stronger hotspot (like any standard camera mounted flash would) but is more efficient than the bare bulb head. When shooting on battery powered strobes, every consideration must be made to conserve power and squeak every shot out of a battery when on location. How does the AD200 do in terms of battery life? The documentation boasts 500 plus flashes at full power. Does it live up to the hype?

Battery Life

I know what you’re thinking, 500 full power flashes on a single charge with a battery this small seems inconceivable. When I first purchased the AD200 I was terrified the battery would give out the first time I took it as my key (primary) light on a location shoot. The first shoot I did with the AD200 was a low key Bodyscapes style portrait session, so I was not pushing as much power as you would with a standard portrait session. I ended up shooting around 50% power most of the day and after 1000 images I was done with the shoot and still had plenty of power left in the battery to keep going. I set myself up for success shooting lower power for the first shoot purposely and I was very happy with the results. The strobe performed very well, experiencing only one misfire during the shoot.

Feeling quite confident in the AD200 at this point, I scheduled a regular portrait shoot where I would be overpowering bright daytime indoor light. I didn’t buy a second battery for the AD200 as I was determined to run it out of power during a shoot. Would this relatively cheap strobe have enough power to last through a portrait session where I would be pushing the power capabilities of the unit? I setup with AD200 in a Godox S-type bracket which would give me the ability to attach a 32-inch Godox umbrella. Side note: I’m not a Godox fanboy or anything, I just happened to find all this Godox gear on sale at Amazon. Setting the exposure my ambient light, I fired up the AD200 in High Speed Sync (HSS) since at ISO 100 with an aperture of 5.6 (because I wanted the background to be somewhat in focus) I was at 1/800 shutter speed which put the unit in HSS mode. I shot all afternoon and ended up with just over 500 images for the day. With the ambient light, the AD200 spent most of the day in full power and after the shoot I still had enough power to shoot more.

I have shot with the unit many times since that day and I still have never bought a second battery and to this day I have never run out of power on a shoot. It appears Godox underestimates their battery capacity. I have since become very comfortable with the power consumption and have yet to run into a problem.

The only downside to the battery for this unit is that it does take a long time to charge to full. Not a big deal, and I haven’t ever had to wait for it to charge during a shoot. I suppose the first time this becomes a problem for me I will buy a second battery for the unit.  

Triggered

I paired the AD200 with the Godox Xpro-C TTL Wireless Flash Trigger for Canon (They have them for Nikon and Sony etc.). The trigger will shoot up to 1/8000s in HSS. The Godox Xpro-C will easily convert TTL settings to manual with the press of a button and has a large easy to read screen. I really like the slanted design and size of the display. If you shoot with a lot of strobes you will appreciate the 5 dedicated group buttons. The 11 customizable functions also make setting up the trigger just the way you like it a breeze. It works perfectly with all the Godox strobes I have tried it with including the on-camera style units. Since the Flashpoint branded strobes are all made by Godox, the Xpro-C worked perfectly with the other Flashpoint branded strobes I have as well.   

How does it drive?

Is the Godox AD200 and Xpro-C combination like shooting with a Profoto D2 or B10? No of course not. Is this setup perfectly serviceable and reliable? absolutely. I use this setup as my primary location setup and have had very few issues. It has never let me down on a shoot and I have yet to buy more batteries. If you are a machine gun shooter, then your mileage is going to vary. I would say I shoot at a normal pace and the AD200 has little issues recycling in time before the next shoot. My use scenario is low and normal key portraits and product photography. I don’t shoot sports, but I would say that the recycle time (the time the strobe needs to get ready for the next shot) would likely be a bit slow if you were looking to do images of dancers in motion. If you are looking for this type of recycle time the Profoto D2 is probably a better fit.  

I have shot with everything from cheap radio popper triggers cobbled with cord adapters onto 20-year-old speedotron strobes to current generation Profoto and Broncolor gear. The Godox AD200 and Xpro-C trigger setup is perfectly serviceable, and functions well. It isn’t going to recycle as fast as a Profoto B10, but then it doesn’t cost over $2000 either. If you are shooting fast, you might miss a shot here and there, but overall, it is a very nice rig to shoot with. I would recommend this setup to anyone.

Color

Here is another one of those things that other reviewers don’t mention. I am a stickler for color, and one reason to use a manufacturer like Profoto over Godox is consistency of light output. The Godox strobes (just like all other top rated cheap strobes) has a tendency to shift light color or power a bit over the course of your shoot. Some shots won’t be as bright, while others may be a bit off in terms of color (a bit). This effect isn’t a big deal and is something almost every budget strobe does. The effects of this color and brightness shift is easily countered by including a color checker in your first shot and using their software to adjust the color and brightness of all the shots in your session. This is not a bit deal for me. To date, I haven’t lost a single shot due to inconsistent light output. I use the AD200 in my professional work without problem. I only mention this point, because this is an honest review and if I were in your situation I would want to know. As a working professional, I don’t consider it any more a problem than I would using any other budget strobe.

Accessories

The Godox AD200 has been widely adopted in the photography community so there are a ton of options for accessories. Batteries, brackets gels, barn doors and a million other accessories are readily available for this little strobe. If you shoot weddings, this is a perfect strobe, because it is light and put out plenty of power to shoot in most situations. I especially like that there are a few different heads available now, such as the LED head which turns the AD200 into a continuous light for video and a round head making the light output look similar to the Profoto A1. This really is a great little versatile strobe.

Conclusion    

I reviewed the AD200 and Xpro trigger because this is the gear I use in my work. There are a million and one YouTube videos and written reviews for these units, but not all of them are totally honest about real-world experiences. The AD200 is a great alternative whether you are just getting started or if you are a seasoned pro looking for a reliable second or location kit. I love that I can throw this strobe into my camera bag with all my lenses and have a perfectly serviceable location shooting setup that is light and has enough power for portraits and plenty of battery life.

I love to hear from my readers! If you have questions about this or any review on this site, or If you have a product you would like us to review, drop me a message on Twitter or on the contact form here on the website. Have a great day!

Twitter: @EpicShit9

Links:


Get yours here: Flashpoint 10″ C stand

Whether you are just starting out in photography or you have been shooting for ages, a C stand is something every photographer should have in their studio arsenal. The C stand, or century stand has been around since the golden age of filmmaking. The hallmark of the C stand is their sturdy three footed base and their weight. The C stand is considered an industry standard for lighting support and there is no shortage of accessories available for them. This is likely one of the most versatile stands available, but are they worth the weight and trouble?

An Alternative

When you mention a C stand to anyone who is intimately familiar with studio lighting the brand Avenger will undoubtedly come up. The Avenger name is synonymous with C stands and was unchallenged until recently.  Avenger C stands retail for around 200 dollars, but competition has arrived in the form of the Flashpoint 10′ C (Century) Light Stand. Products with the Flashpoint name are made and sold by Adorama, a well-known camera store with a large online presence. Adorama also releases their own version of many Godox studio flashes under the Flashpoint name. You can search here on Epic Shit for reviews we have done featuring Flashpoint strobes and equipment. I consider the Flashpoint 10′ C (Century) Light Stand a good alternative to the higher priced Avenger stands and the Flashpoint version comes in at about half the price, 99 dollars.

Comparison

In my years in the photography industry, I have worked in many studios and came to trust the quality and sturdy nature of the Avenger C stands, so when Adorama introduced the Flashpoint 10′ C (Century) Light Stand I was a bit skeptical that a stand half the price of the beloved Avenger stands could compete. My strobes are not cheap and putting trust into a stand to keep my gear from crashing and burning on the floor is something I don’t take lightly. I ordered a Flashpoint 10′ C (Century) Light Stand and hoped for the best. The stand arrived quickly from Adorama and my first impression upon opening the box was that this stand is as heavy as the Avenger counterpart and seemed like it would support a small child without breaking a sweat. The Flashpoint 10′ C (Century) Light Stand weighs as much as an Avenger stand and came standard with many of the grip pieces that need to be purchased separately when investing in an Avenger stand.  The Flashpoint 10′ C (Century) Light Stand I ordered form Amazon (link above) came with the standard turtle base, and some very useful other goodies. The kit included a 40-inch grip arm, two GOBO heads (the heads that allow you to move the arm around or attach accessories to “go between” your light source and your subject) and even a baby pin. The baby pin is a piece of metal which inserts into the GOBO head and allows you to attach any strobe with a standard base. With this kit, if your strobe will fit on a regular light stand, it will fit on this C stand.

Compatibility

The most common question I get when I tell a fellow photographer about the Flashpoint 10′ C (Century) Light Stand is “will it work with my [insert strobe brand here]”? Part of the accessory kit that comes with the Flashpoint 10′ C (Century) Light Stand includes the Baby pin, which slides into the grip heads and will allow you to attach any standard strobe. I commonly use mine with a Godox S-type bracket and AD200 strobe as well as my Profoto D2, B1 and B10. I know that this stand will work with any standard Elinchrom or Paul C Buff strobe series as well. As long as the strobe will fit on a regular light stand, it will work perfectly well with the Flashpoint 10′ C (Century) Light Stand – except it will be a lot more sturdy.

Using the C Stand

If you have used other straight light stands, you may have noticed that once you get your strobe, and maybe a softbox or octabox on there they can feel a bit “tippy” or unstable. We are all using sandbags on the base of our light stands right? I mean, safety first right? We would not want our lights to fall on our clients. The C stand does not remove the necessity of sandbags for stability, but when you have a whole strobe and modifier rig on one it feels so much more stable than a standard straight light stand. The first thing you will notice about the C stands is that they are HEAVY, especially compared to a regular light stand. If you will use them in your home studio mostly, I recommend investing in the caster set which allows you to easily roll your whole rig all over effortlessly. I use my Flashpoint 10′ C (Century) Light Stand at home in my studio and on the road. Due to the weight, I never bring it with me on planes but if I am shooting local, I always throw it in the back of the car.  You will be surprised how sturdy the C stand is compared to other light supports. Every photographer I recommend them to never looks back and always ends up getting at least two. Even if you are using the Flashpoint 10′ C (Century) Light Stand as a straight light stand and taking off the grip arm, it will still be significantly more stable than a standard light support.

Tight!

The biggest difference between a standard light stand and a C stand is that the C stand likes to be tightened, I mean really tightened. I can’t tell you how many times I have been able to get my strobe in just the right position by just cranking down on the grip handle. If you don’t have a lot of hand strength this might be a tough item for you to operate, just like if you don’t feel comfortable lifting a heavier-than-it-looks stand with a strobe and modifier attached. Therefore, I suggest practicing with the stand before you take it on a shoot or shoot a client in your home studio.

Negatives

We have fully established that C stands in general are heavy, so that isn’t really a negative, it is more of a point that should be reinforced. The only negatives I have for the Flashpoint 10′ C (Century) Light Stand is that it is only available (as of this writing) in chrome. Many like the look of the black versions of C stands and the Flashpoint model is not available in other colors. The newer Avenger stands also come with an updated design for the turtle base, where one or more of the legs can be lifted to set the stand up on an uneven surface. This (for me) would only be a big benefit for shooting outdoors in rocky terrain or on stairs. These issues are certainly not a deal breaker by any means, but hey – I had to find something to ding them on, right? This stand works as well as any Avenger stand I have used so other than color this is as close as you can get to a perfect but cheaper than an Avenger option.

Do you need one?

The short answer is yes. The cost of the Flashpoint 10′ C (Century) Light Stand is very reasonable given how much you will probably use it. I have turned so many photographers on to C stands, and always love to hear from people who have been converted to the way of the C stand, please drop me a message and let me know about your experience! I would love to hear from you.

If you have a product you would like us to review, drop us a message on Twitter or on our contact form here on the website. Have a great day!

Twitter: @EpicShit9